Tuesday, December 29, 2015

Engineering a DIY Easy On, Easy Off, Stay Tight, Upholstered Daybed Mattress Cover Semi Tutorial

First off, I am not a seamstress, which is why this is a semi-tutorial.  I focus most of my creative energy on jewelry.  I think the finished product turned out pretty well.  The pictures show the completed day bed cover and from that, if you are good at visualizing or a strong seamstress, you can put it together in whatever fashion you would like.  Keep in mind that I based the entire concept on a box pillow cover with piping.

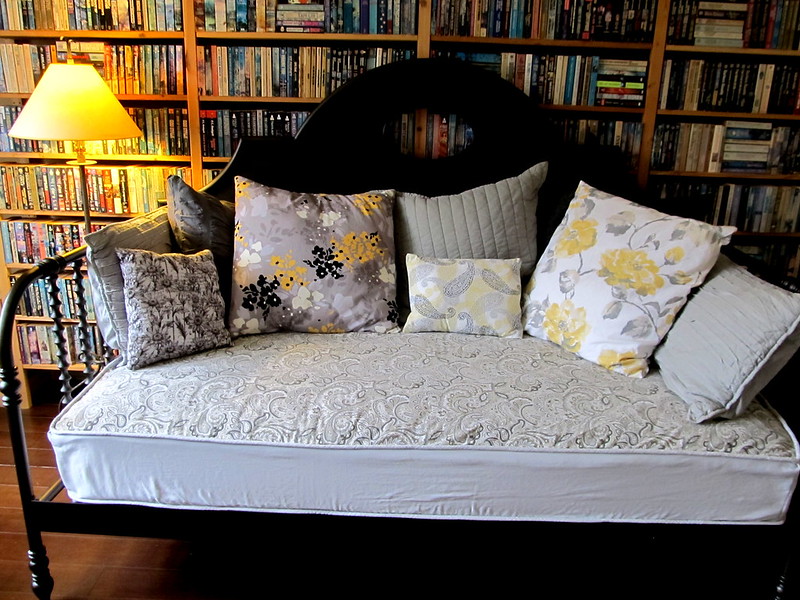
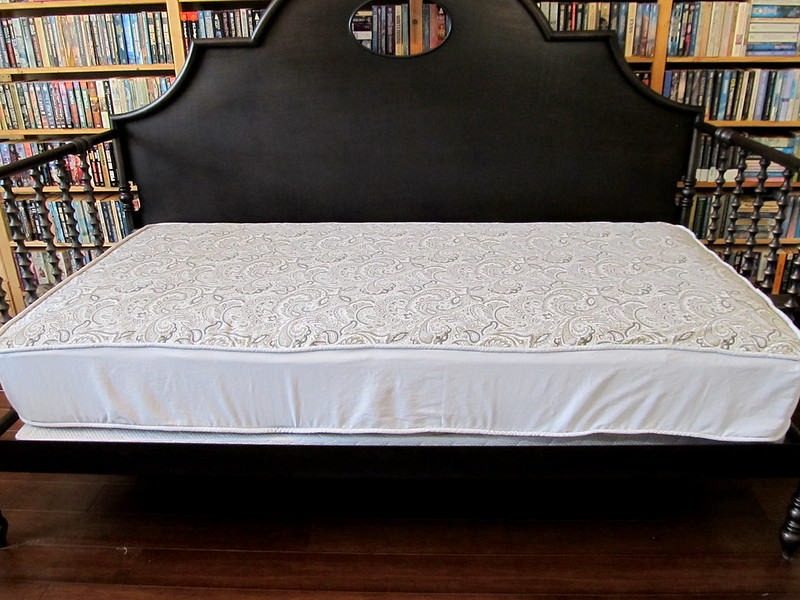
The finished product.  Ignore the fact that I did not pull all the wrinkles tight on the front view- I was tired.  There are other finished picture at the end of this semi-tutorial.

Second, I did indeed throw all the key-words into the title.

Okay, enough counting and onto the business at hand.

You are likely here because like me you discovered that a fitted daybed cover is expensive and available only in limited colors.  You may have tried a fitted sheet, or a folded cover, only to discover that it does not stay put and does not maintain the smooth finished look you are going for.

I based the design on a basic box pillow cover.  You can find multiple tutorials on-line, in books, and most especially on YouTube.  (I repeat, this is a semi-tutorial; a guideline to inspire you.)

I modified the basic box concept to replace the back of the cushion with a flap- adding the benefit of no zipper- and replacing the bottom with three flaps, thus the Easy On, Easy Off of the title.

My upholstered cover is tied on.

Let us start with my terminology:
  • Top - the part you sit on. 
  • Bottom - the part that rests on the box springs or slats. 
  • Sides - are the short measurement where the arm rests are. 
  • Front - the long side which faces the world.
  • Back - is opposite the front and on most daybeds against the bed frame or wall. 

Note, if you have an open or exposed back, this project will need tweaking at a minimum or may simply not work.

Fabric Measurements- your measurements may vary.  (My cuts allow for a 1 inch seam allowances.)
  • Top:  77 inches long x 41 inches wide
  • Sides:  41 inches long x 10 inches wide (my mattress measured 8 inches high)
  • Front:  77 inches long x 10 inches wide
  • Top piping or cording fabric: 248 inches long x 3 inches wide  (I used 12/32 diameter cotton cording)
  • Bottom piping or cording fabric: 171 inches long x 3 inches wide
Now for the engineered cuts:  (This will be explained below)
  • Two Side bottom flaps: 38 inches long x 8 inches wide each (1 for the right 1 for the left)
  • Front bottom flap: 75 inches long x 6 inches wide
  • Back top flap: 75 inches long x 4 inches wide (guessing on the width here.)
  • Four long ties:  50 inches long x 3 inches wide each
  • Four short ties: 10 inches long x 3 inches wide each
  • Four tie guides:  3 inches long x 3 inches wide each

Lessons Learned:
For my first attempt I might have been better off using french mattress seams instead of cording or using a smaller cording and buying bias tape.  I did not cut my fabric for the cording on a bias.

I cut the sides in three pieces giving me a front corner seam on the left and right.  I did this to make the fit more obvious and to better match my ability to fit the finished product to the mattress.  The end product would be more professional looking without that additional seam.  The alternative would be to make the sides- front, left side, and right side one long piece.  In this instance, the measurement would have been 149 inches long x 10 inches wide.  Another benefit of side seams is that it allowed me to cut down on the yardage I needed to purchase.  

I would have cut the Front Bottom Flap wider- just to give it a tighter fit.

I would have cut the short ties longer for a prettier bow.

The Semi Tutorial or Putting it Together:

If you are making your own piping, make it first. The reason you need different lengths is because the top piping goes around all four sides and the bottom piping only goes around three sides, i.e. front as well as the left and right sides.  My fabric cut for the piping reflects those measurements plus an additional 6 inches.  (I would rather trim than not have enough; you may be a better seamstress and prefer no waste.) 

Next, create the sides of the cover by sewing the left side to the front on the sides measuring 10 inches and the other edge of the front to the right side.  This will create one long piece to cover the three sides (height) of the mattress, or a 149 inch length by 10 inch wide.  Set this piece aside for a moment.

Sew the piping to the top around all four sides.  If you are an experienced seamstress you may, in one fell swoop, sew the piping to the top and sides at the same time.  I am not an experienced seamstress so I found sewing the piping only to the top a necessary step before sewing on the sides.  It also gave me an early opportunity to make sure my fit was right.  I used a zipper foot but for this large a project if you are using smaller cording a cording foot might be a worthwhile purchase.  Also, if you use a smaller cording it might be beneficial to actually buy washable bias tape.

As stated above, this is an early opportunity to check the fit.  Place the top on the mattress and check the fit of the pipped top.  At this point I also pinned the left side, front,  and right side to the top to check that fit as well.  This is the time to make adjustments.  

Now the engineering begins.

Sew that long piece you just set aside, that is the left side, front, and right side to the top piece on the other side of the cording.  This is just like every box pillow cover tutorial to this point. 

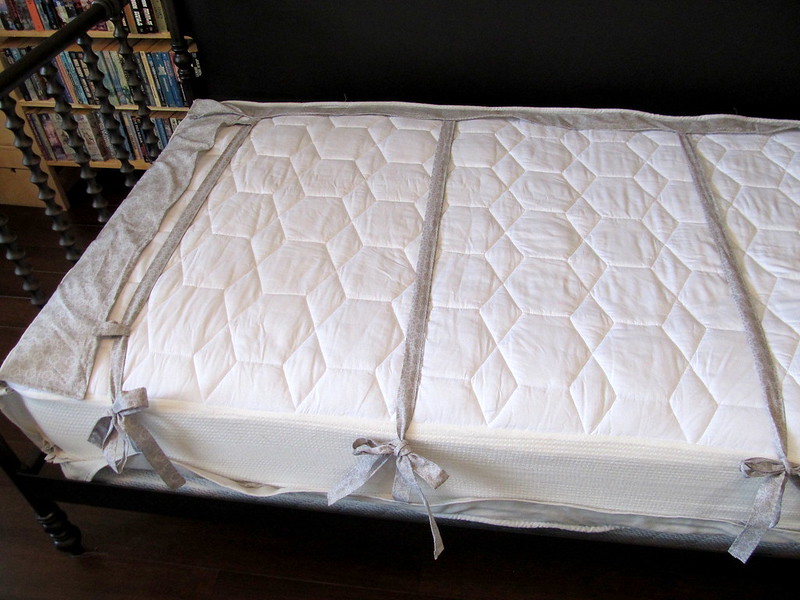
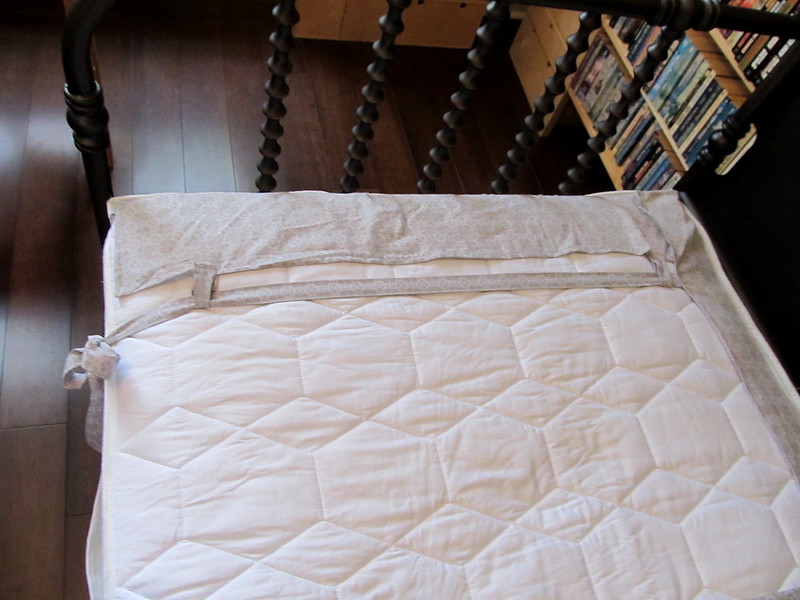
Below is a picture of the back of the daybed cover so you will understand my directions.  I took the pictures with the mattress upside down so that all the engineered parts would be easily visible.  Flip the picture in your minds-eye.  (I did say semi tutorial.)  That floppy part at the bottom of the picture, I called the back top flap above.  Let me explain that name, when properly placed it is a flap sewn only to the top on the back of the day bed cover which is then tucked between the mattress and the daybed.
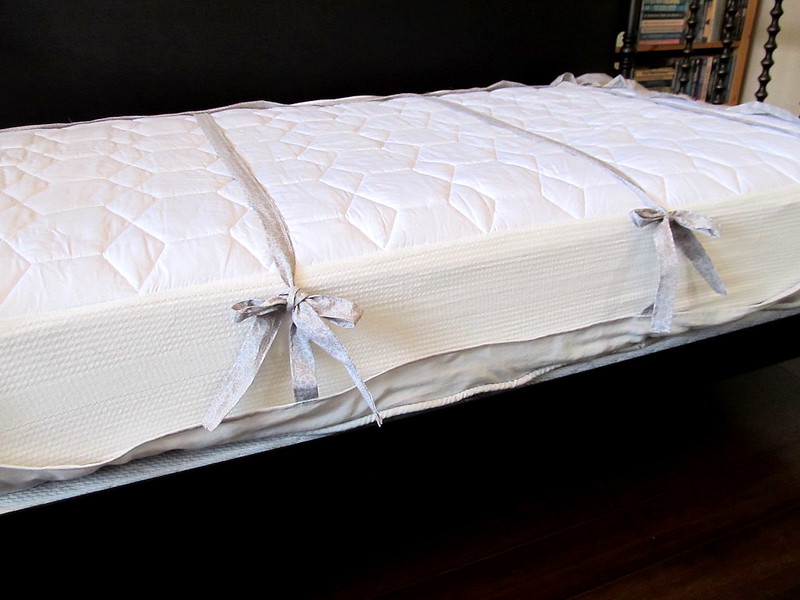
Back top flap- yes, it is upside down and backwards!  It was the best way to take a picture.

Pause before continuing on to the fourth side with what I have named the back top flap. This is the flap that attaches to the top of the cover and will be sandwiched between the mattress and the daybed. Sew a small hem the length of the back top flap and along the two short sides, this will create a finished back. Now, attach the non-hemmed long side to the top of the cover.  You do not want to sew the back top flap to the side pieces just to the top piece on the other side of the cording. This piece provides an anchor for the ties. This will give you a nicely finished top and, as advertised, make the cover easy on, easy off.  Bonus, it will also give you a pretty back- an easy tweak would be to make it a bit longer thus covering more of the mattress.

At this point you have the top completed and the sides sewn on.  Most of the work is done!

More engineering pictures ahead.

This is a picture of the completed bottom of the mattress:
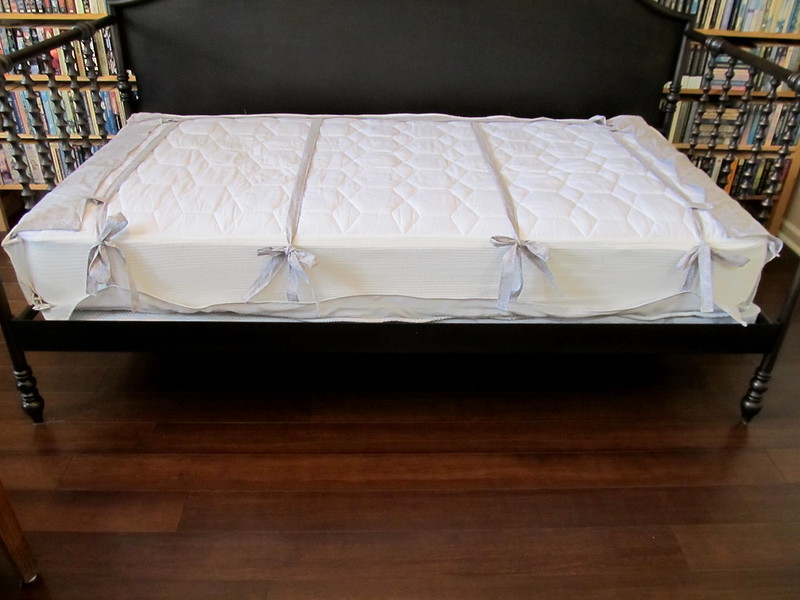
Completed bottom of the mattress

At the top of the picture below is a close up of the side bottom side flap and the tie guides:
Side bottom flap at the top of the picture with the front bottom flap to the right on the picture.
Below is another view showing three of four flaps. 
At the 12:00 O'clock position is the front bottom flap.  The 6:00 O'clock position is the back top flap.  The 9:00 O'clock position is the side bottom flap.
Note also the tie guides attached to the side bottom flap. 
Instructions Continue:

The purpose of the bottom flaps is two fold
(1) to tuck under the mattress just as you would tuck in a sheet and
(2) to provide a place to anchor the ties.  Both the tuck and the ties are what makes this cover stay on tight. 

Picking up where we left off...

Now, sew the piping, or cording, to the bottom of the three sides, left, front, and right.

Take the monster you have created and fit it to the mattress.  Is it a good fit?  Make adjustments if it is not.  (I won't admit to how many times I ripped out seams up to this point.)

Lesson learned here- I used upholstery linen and it frayed quite badly.  If you use a similar fabric you might want to hem or finish all the edges.

After you have tweaked the fit, you attach the three remaining flaps to the bottom of the sides.


Sew a small hem around three sides of both side bottom flaps so you will have finished edges. (Yes that was a very convoluted sentence.)  These are the flaps which will go under the mattress on left and right sides.

Using your scraps, make the four tie guides; these are like belt loops on pants.  These can be any width, I made mine three inches wide and three inches long and that worked out well. When folded and seamed they were about 1.5 inches wide. 

Attach tie guides to the hemmed side of the two side bottom flaps.  I used two per flap and positioned one near the front of the mattress and one near the back.  You may attach as many as you would like. These tie guides essential to keeping the upholstered cover tight.

Now, sew the unfinished sides of the side bottom flaps to the corded sides.  Think of these flaps as a partial bottom to the box pillow cover I keep referencing.

That leaves one last flap.  This is what I have called the front bottom flap.  This is the flap that will tuck under the front of the mattress and tie to the back of the mattress.

Hem three sides of the front bottom flap, one long side and two short sides.  Then attach the unfinished long side to the piped edge of the front.  Note- do not sew the short edges to the side bottom flaps.  This should be attached only to the front.

You should now have the left side, front, and right side sewn to the top; piping sewn to the bottom edges of the left side, front, and right sides, and the bottom flaps sewn to the left side, front, and right side.

Take a deep breath, almost there.  Now create the ties.  You are going to make a total of eight ties.  Make four long ties, 50 inches long by three inches wide, which will attach to the front bottom flap.  and four short ties measuring 10 inches long by 3 inches wide.  Being the inexperienced seamstress I am, I thought I would just sew the wrong sides together and then pull them through and press.  Wrong!  Too much bulk or an impatient maker.  I made use of my hot iron and pressed in a small hem on each long side and then top sewed the long seam on every tie.  Then tuck in the ends and finish the ties with a hem.

I measured at this point to determine where to sew on the ties.  Since the finished side bottom flaps are approximately six inches wide I measured in six inches from each side on the front bottom flap and attached a long tie at that point.  If you made your bottom flap wider, as I will do if I make another cover, use that as a measurement.  Then I measured the distance left between the two ties and decided the middle ties would be best placed closer to the middle than to the edges to assure a cover which will stay in place...  I ended up with the ties placed 25 inches from the edges.  Whatever measurements you come up with, make sure you write them down because you are going to need to use those same measurements to attach the short ties to the back top flap.  (Oh my all these flap names are making my head spin.)

Now sew the four long ties to the hemmed side of the front bottom flap and then the four short ties to the hemmed side of the back top flap.

You are done sewing.  Now to fit it to your daybed.

I found it easiest to lay the cover on top of the mattress leaving the flaps loose and untucked.  Facing the front of the bed, run the long ties through the tie guides on the sides and then flip and tuck the side flaps under the mattress leaving the long ties hanging out the back.  The tricky part is pushing those long ties in the center to the back.  It really is just like tucking in the sheets except you need to hold the long tie in your fist and push as far as you can before letting go.  Pull the daybed away from the wall (or the mattress away from the daybed) and reach under the mattress and tug those center long ties all the way to the back so they hang loose.  Now, tie a pretty bow with the long and short ties and push the bed back into place.

Done, done, done. 

I have been living with this cover for about half a year and it has stayed put and looks fabulous, even if I do say so myself.  

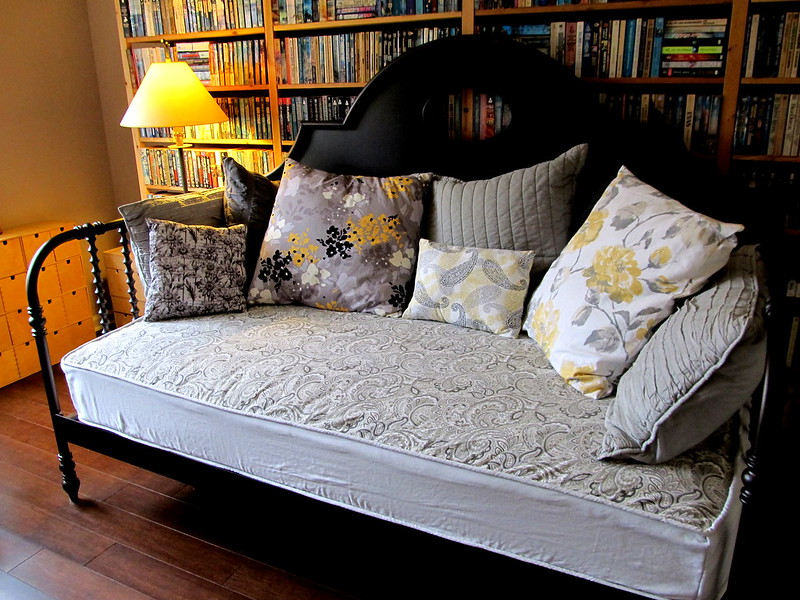
Done and decorated and still a bit wrinkled, but I am blaming it on the linen this time.

From the top
From the right side

Sunday, December 13, 2015

Winter Gifts

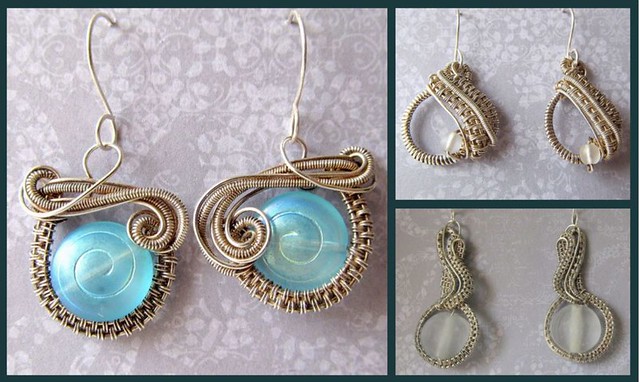
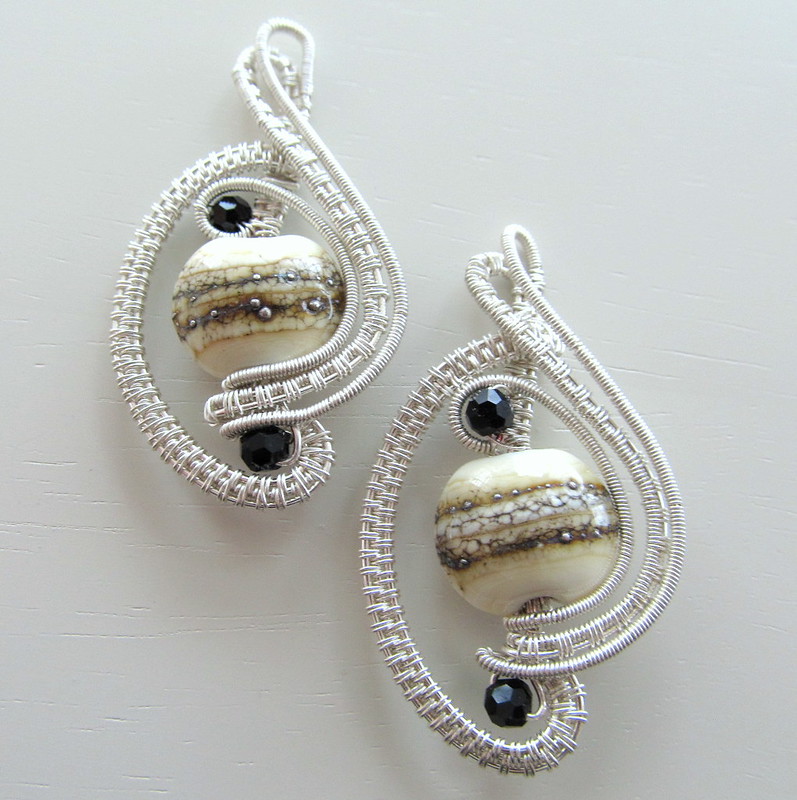
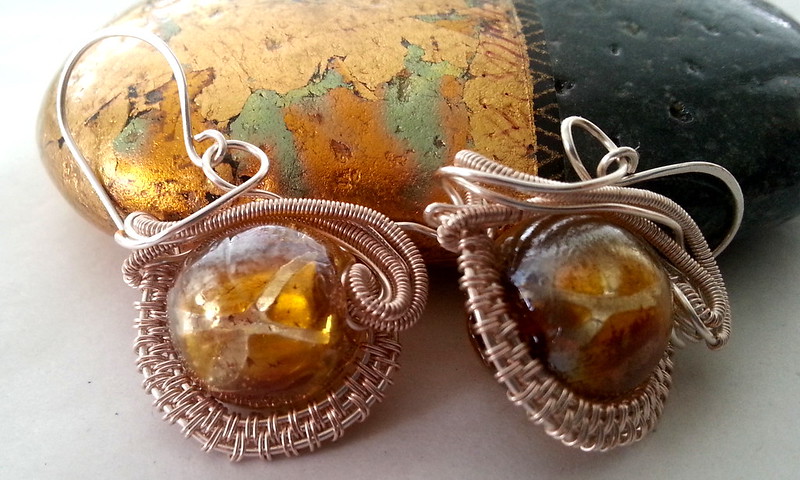
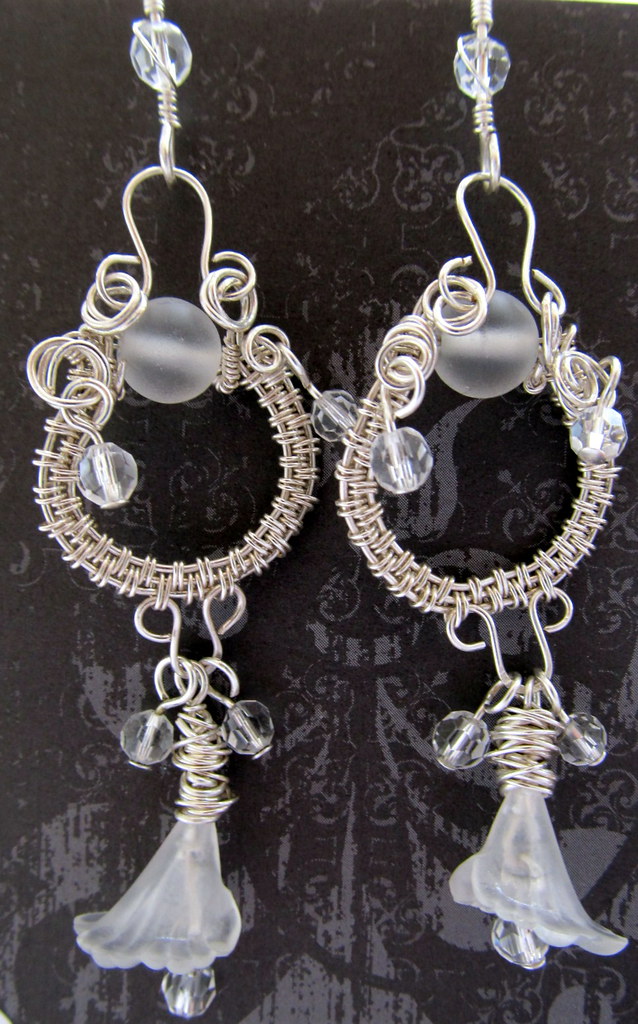
I am blessed with a supportive extended family.  In appreciation I sent earrings to two aunts and a cousin.  Below are photos of what I sent.

Lessons learned:
  1. do not take pictures in a hurry; none of them were straight, making one earring look bigger than the other. 
  2. every flaw shows when you take a picture, but I bet you knew this.
  3. take pictures of the earrings closer together.
  4. a folded paper tent for hanging earrings works great, but make sure the holes are not ragged and they align. 
  5. making jewelry is still a lot of fun.

Again, let me express my thanks to Nicole Hanna for wonderful tutorials. 

Here is another collage.


Have a great holiday.

Monday, October 19, 2015

Two Links to Act on Now

The first link is to one of my favorites, Nicole Hanna.  Nicole has a link for a one year on-line jewelry retreat:  Giveaway Art Jewelry Adventure All Inclusive Online Retreat.  Even if you do not win the giveaway, this is a great deal at $99.00.

The second link is one to bookmark.  Milissa Ingram has compiled a list of Trademarked Czech Pressed Glass Beads. I know that you do not have enough beads and this will let you know where the holes in your inventory are.  Plus, I am just really fond of lists.

Tuesday, October 13, 2015

Look Ma, No Hands... err... Training Wheels

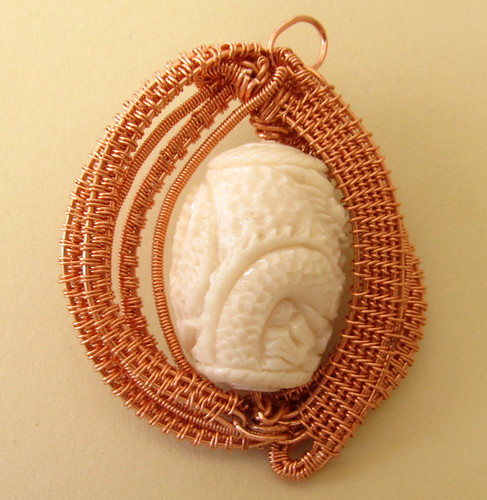
I almost titled this graduation, but I could not get graduated beads out of my mind.  This is my first wire weave without a tutorial.
Sea Dragon wireweave - my first creation

Nicole Hanna has been a great teacher.  I know I have mentioned that fact at least a dozen times; I am truly grateful.  All boo-boos are my own.  Despite the title, I did just purchase a few more tutorials from her.  She really is that good.
snip-snip

Last month I posted a mermaid necklace.  I picked up the resin sea dragon bead at the same time.  I am not sure I am going to keep this pendant.  Here is a picture of the part I snipped off that was not working.

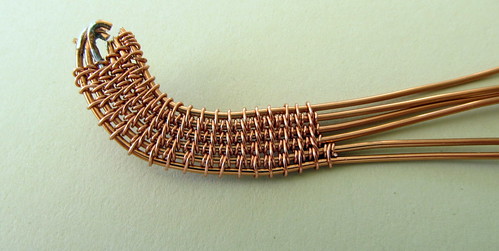
You can see that the "copper" wire I bought at a local craft store labeled copper is merely copper plated.  *Shakes head, rolls eyes*  Honestly, copper is not that expensive.  It had to be more costly to create plated wire.  I have learned my lesson.  My future wire purchases will come from monsterslayer.com  Not only is the price right, but copper means copper.  Plus I can get 28 gauge copper wire.

Sea Dragon back


Want to see the back?  I always do.  I think it turned out well.  That is, the wires are all neatly tucked away.


One more picture.
Sea Dragon again

Wednesday, September 16, 2015

Something Old, Something Vintage

Or another appropriate title might be using up that stash.
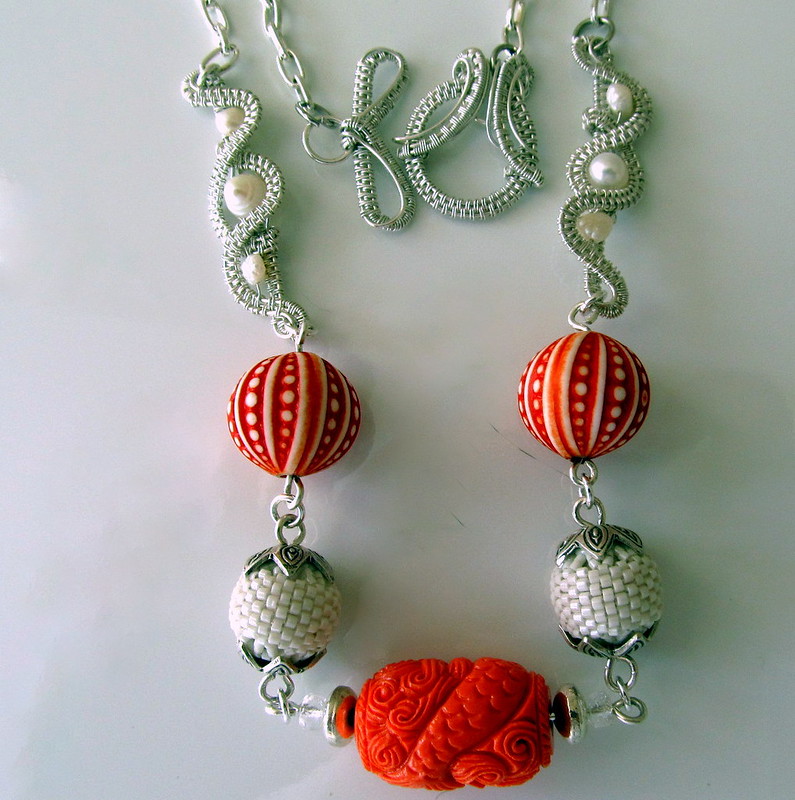
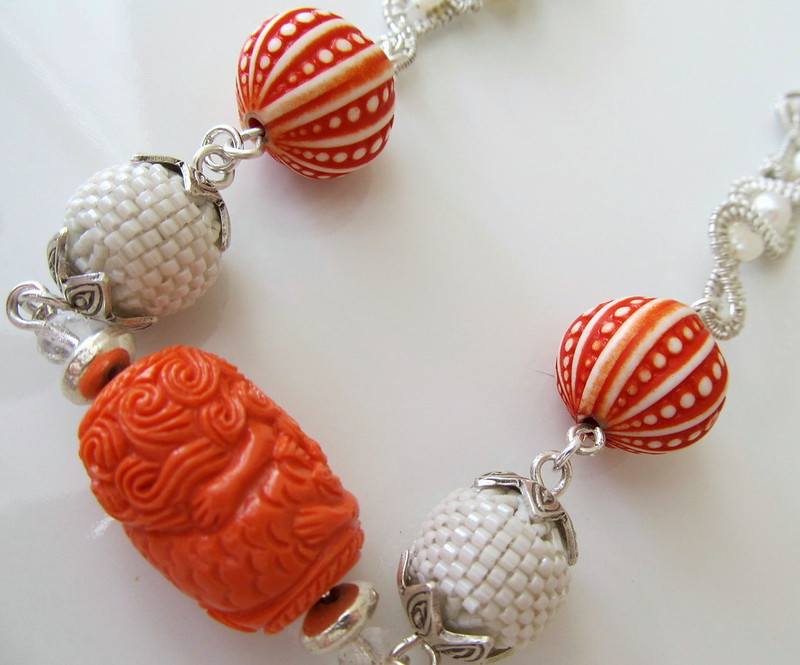
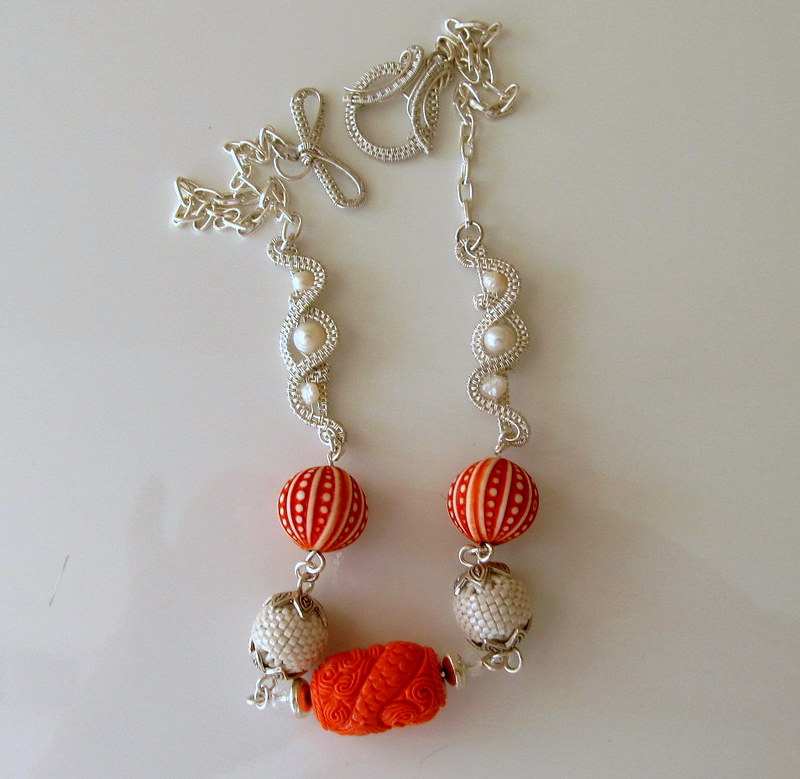
The mermaid necklace
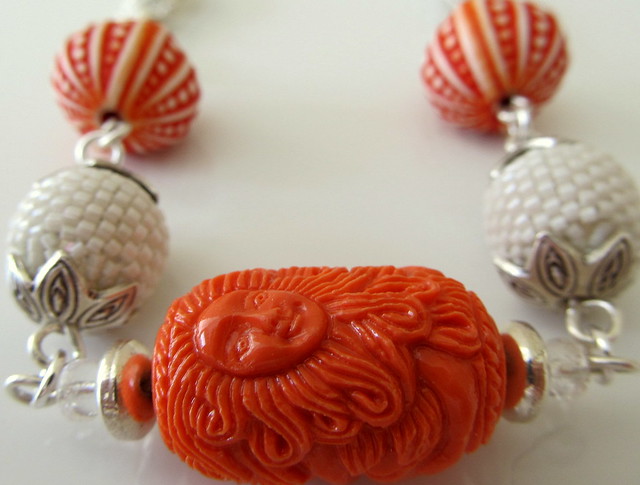
You may be wondering why is it called the Mermaid Necklace because the picture above only shows a part of the mermaids tail.  I purchased some resin mermaid beads at On A String, now known as Beads, Inc., in Charlotte about 5 years ago.   That is the something old in the title.


A beautiful face


Another view


Tails


Inspiration finally struck as I knew it would.  I visited Ornamentea in Raleigh NC about a month ago which is where I found the vintage beads of the title. They reminded me of sea urchins.


Ornmentea is a friendly store with quite an interesting collection of tempting treats. These vintage beads actually had me pulling out my wallet. 

In addition to the something old and the something vintage, I added a beaded bead with a sterling bead cap. Is there ever a time that is inappropriate for a beaded bead?  Probably, but it went beautifully here.


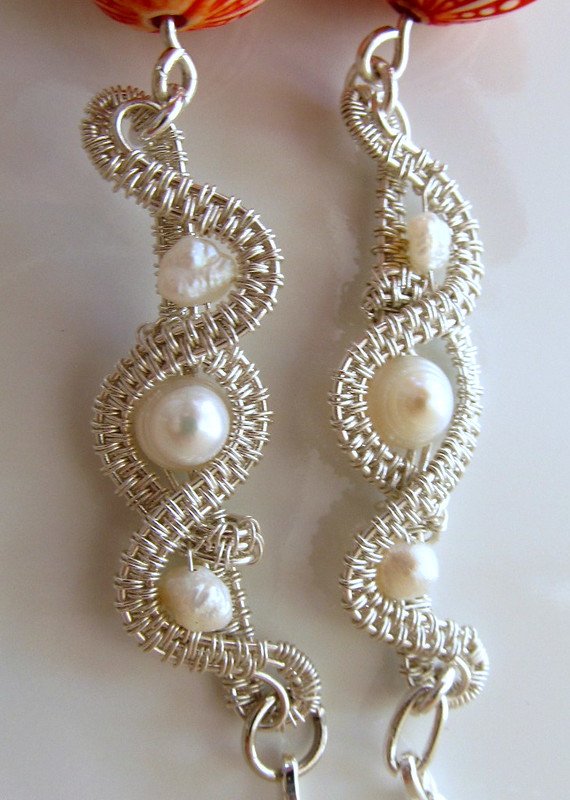
If you have been following me for a while you know I have been learning wire weaving.  I added sterling woven wire links from a Nicole Hanna tutorial


My wire weaving is a work in progress, but I think I am ready to start on my own designs.  I have some additional resin mermaid beads, another orange, a larger one in white, and two turquoise mermaids.  I think they would make a very lovely wire wrapped focal. 

What got me started on the wire weaving quest was the need for clasps.  I was not satisfied with the swan "S" clasps which were quick and simple.  I have a nice stash of sterling toggles that I have picked up here and there, but...  well...  I can't actually say why I grew dissatisfied with them other than to say I wanted something that was all my own.

So, another Nicole Hanna tutorial because despite my efforts I was not quite ready to design my own.
Clasp from Nicole Hanna tutorial


I know I have mentioned Nicole Hanna many times in the past, but let me add a few finer points. 

(1) She is very helpful.
(2) Her tutorials are easy to follow.
(3) She has these really great videos on YouTube under the channel title of Go Art Yourself. 
(4) And, based on my own experience, if you have been doing bead weaving and wire wrapping for a while you will probably learn this new skill quickly. 


One final picture.
The mermaid necklace

Thursday, February 26, 2015

Mistakes Were Made- Again!

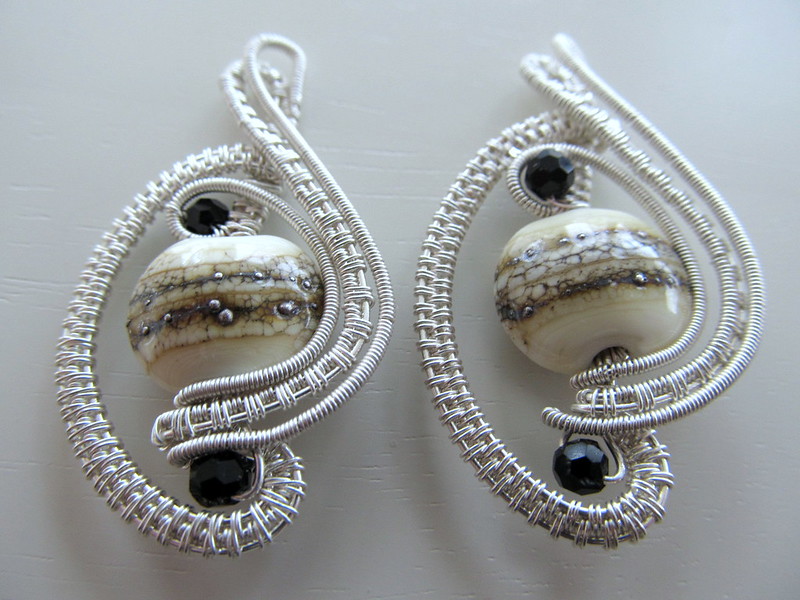
You would think that once was enough, but I made the same mistake again.  I made both earrings face the same way.
Based on Bottled Bead tutorial by Nicole Hanna
It took me two weeks to finish the second earring; other things just kept getting in the way.  I was pretty near bending the last wire when it struck me that I had both earrings facing the same way.  The problem is that when I follow the tutorial for the second earring I do not stop to think that it should be facing in the opposite direction.  Have you ever done this?  Tutorials and wire weaving are certainly out of my comfort zone.

Earrings based on a tutorial by Nicole Hanna
Maybe I should make a second pair facing the opposite way and in that way obtain a two perfectly good sets of earrings? 

Despite all that these did turn out lovely.  I still swear by Nicole Hanna's tutorials.

Sunday, January 4, 2015

Practice Makes a Good Gift

I continue to practice my wireweaving.  I made these earrings for my mother.

from Cupcake Earring tutorial by Nicole Hanna

I apologize for the picture quality- Android phones are not the best way to populate a beading blog.  Nonetheless, I thought it would be a good opportunity to post something.

I am really enjoying learning this new skill.  I like the results. 

It is keeping me busy while I ponder my next bead woven piece.


Saturday, December 6, 2014

2nd Annual Bead Hoarders Blog Hop

First things first...

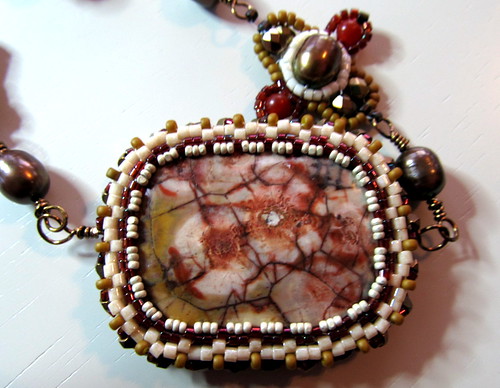
Bead Hoarders jasper necklace with hand made clasp and pearl and beaded bead strap
As you can see from the caption, the focal is Jasper.  I bought this at a bead show where I swore I did not need a thing and was not going to buy anything.  Yeah, that did not quite work as planned.

Glass copper colored edge beads
I love this jasper, it has wine, olive sometimes bordering on mustard, and cream colors. What is not to love?  It is a great size, approximately 40 mm x 30 mm. 

The two sides have different colored edging:

Copper Edging


The other side is edged in olive:


Glass olive colored edge beads


Due to poor planning on my part I did not capture enough photos during the daylight hours.  Unavailable is a clear view of the brass cut beads embellishing the edge of the focal.


What I did capture was a picture of the hand made clasp on the bust.
Hand made clasp, based on tutorial by Nicole Hanna

Bead hoarders special
If you have visited me before you will know that my first love is seed beads.  You will also know that I am just learning how to weave wire and my go-to source for tutorials is Nicole Hanna.  I really am just learning.  I have made a couple of pairs of earrings and done a little bit of design exploration.  It is easier than it appears.  I want to design my own clasps and this is a start.

One last picture before you make your way to the other participants of the necklace on a bust.  Again, poor planning, I took the photos in the late afternoon on a day off, and this was the best I had.


Finally, thank you to Lori Anderson for hosting this blog hop and providing the opportunity to share and the push to create.  Thank you for visiting.  The other participants are linked below.

Lori Anderson www.PrettyThingsBlog.com  (Hostess)

Audrey Belanger
esperianterra.blogspot.com
Jenny Kyrlach http://anafiassa.blogspot.com/
Kathy Lindemer http://bay-moon-design.blogspot.com/
Lori Schneider http://beadaddicted.blogspot.com/
Dee Elgie http://cherryobsidia.blogspot.co.uk
Dolores Raml http://craftydscreations.wordpress.com
Rebecca Ednie Http://eclecticendeavours.blogspot.com
Lili Krist http://emjestudio.blogspot.com/
Marybeth Rich http://forestofjewels.blogspot.com/
Hannah Rosner http://goodrivergallery.wordpress.com/blog/
Nicole Prince http://healingbeading.blogspot.com/
Deana Hager http://justdeesarts.blogspot.com/
Jackie Ryan http://kydojewellery.blogspot.co.uk/
Elsie Deliz-Fonseca http://ladelizchica.blogspot.com/
Mowse Doyle http://mowsemadethis.blogspot.com/
Evelyn Shelby http://raindropcreationsbyevelyn.blogspot.com
Lisa Johnson http://spudandmrsbutters.blogspot.com/
Terri Gauthier http://terrisbloomingideas.blogspot.com/
Patti Pruhs http://threebeadsandastring.blogspot.com
Shai Williams http://www.shaihasramblings.com/
Andrea Glick http://zenithjade.blogspot.com/
K Hutchinson https://jumbledhutch.wordpress.com
Marci Brooks https://thatnothingbewasted.wordpress.com/
Jo-Ann Woolverton itsabeadifulcreation.blogspot.ca
Jasvanti Patel Jewelrybyjasvanti.blogspot.com
Laurie Vyselaar Lefthandjewelry.wordpress.com
Lisa Knappenberger LIRaysaDesigns.blogspot.com
Mary Lindell marylindell.com
Niky Sayers silverniknats.blogspot.co.uk
Sandra McGriff skyescreativechaos.blogspot.com
Patricia Handschuh thecolorofdreams.blogspot.com
Erin Prais-Hintz treasures-found.blogspot.com
Maria Rosa Sharrow willowstreetshops.blogspot.com
Kathleen Breeding www.99bobotw.blogspot.com
Monique Urquhart www.ahalfbakednotion.blogspot.com
Jackie Locantore www.artfire.com/ext/shop/blog/MorningStar
Sheryl Stephens www.babblebead.blogspot.com
Becky Pancake www.beckypancakebeaddesigns.blogspot.com
Mona Arnott www.bijouxgemsjoy.blogspot.ca
Michelle Escano www.cabbycraft.com
Denise McCabe www.cabewoman.blogspot.com
Carolyn Lawson www.carolynscreationswa.blogspot.com
Sheila Prose www.catswithbeads.blogspot.com
Kim Dworak www.cianciblue.blogspot.com
Iveth Caruso www.CreativeAtelier.net/blog
Deborah Apodaca www.deborahapodacadesigns.blogspot.com/
Elizabeth Bunn www.elizabethbeads.blogspot.com
Janine Lucas www.esfera.me/travel/blog/travel-stories
Kari Asbury www.hippiechickdesign.blogspot.com
Inge von Roos www.ingetraud.wordpress.com
Divya N www.jewelsofsayuri.com
Debbie Rasmussen www.kepirasmussen.blogspot.com
KJ  (You Are Here) www.kjsbeadaciousbeads.blogspot.com/
Klaudete Koon www.klaudetekoon.blogspot.com
Ghislaine Kruse-van Erp www.kruseartllc.com
Ginger Bishop www.lilmummylikes.blogspot.com
Kelly Schermerhorn www.meanderingwithkelly.blogspot.com
Mischelle Andrade www.micheladasmusings.blogspot.com 
Sue Kelly www.midlifegreaterexpectations.blogspot.com
Rachel Mallis www.mintmonarch.com/#!Blog/c1jlz
Susan McClelland www.mistheword12.com
Mary K McGraw www.mkaymac.blogspot.com
Tania Spivey www.moobiegracedesigns.blogspot.com
Stephanie Perry www.mustardbeadbystephanieperry.blogspot.com
Mitzie Crider www.NeedfulLuxuries.Blogspot.com
Nicole Rennell Www.nicolerennell.com/blog
Nicole Valentine www.nvalentine.blogspot.com
Karen Mitchell www.overthemoon-design.com
Tammy Adams www.paisleylizard.com/blog/
Patty Miller www.pattymillerbeads.blogspot.com
Blanca Medina www.peru-medesigns.com
Stephanie Haussler www.pixybugdesigns.blogspot.com
Roxanne Mendoza www.roxidesigns.blogspot.com
Claire Fabian www.saraccino.blogspot.com
Bridget Torres www.shears58.net
Donetta Farrington www.simplygorgeous-donetta.blogspot.com
Lee Koopman www.stregajewellry.wordpress.com
Deb Fortin www.studiok24.blogspot.ca
Susan Walls Www.susansartcircus.com/blog
Cece Cormier www.thebeadingyogini.com
Heather Otto www.thecrafthopper.com
Lizzie Clarke www.theneedtobead.blogspot.co.uk
Elizabeth Hodges www.thewhisperingseas.blogspot.com
Fay Wolfenden www.torchfairy.blogspot.com
Kelly Hosford Patterson www.TravelingSideShow.blogspot.com
Nan Smith www.wirednan.blogspot.ca
Jayne Capps wwwww.mamasgototdoodle.blogspot.com
Robin Kae Reed                                       http://www.willowdragon.blogspot.com/
Melissa Trudinger                                   https://beadrecipes.wordpress.com/


Sunday, November 16, 2014

Learning Curves

It has been a while.  I moved south 550 miles,  I bought a condo that I am planning on retiring in.  I kept my same job but at a new office; then my office moved.  I work enough over-time each and every week that when my neighbors see me they ask me if I have been given time off. I received a promotion on Friday, and will begin training for my new job immediately after the holidays; thank goodness for that thoughtful scheduling.

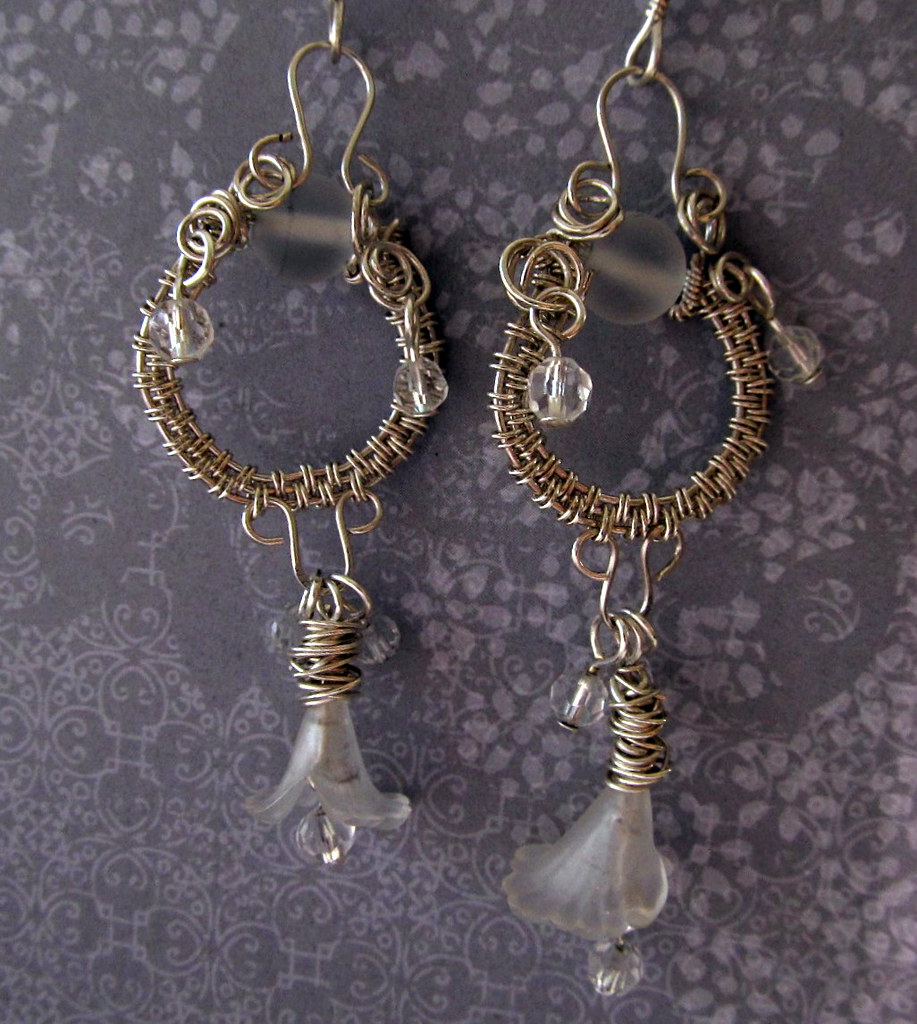
Adapted from Nicole Hanna's Darling Dangles
I am almost unpacked.  I have studio space and my beads are unpacked, but I still have organizing to do.


All that being said, I have been in love with beads for way to many years to give it up.  I am easing myself back into creating but you will forgive me if my plate remains a bit full for the next half year.
 

When last I posted I was making an attempt to learn wire weaving with the help of Nicole Hanna tutorials.  I cannot say enough good things about Nicole's tutorials.  The price point is good.  The instructions clear.  And, based on the few pieces I have done I think that wire weaving is a skill that I can acquire with a bit more practice.  My skills do not do justice to Nicole's work.


One of the other skills I need to work on is photography.  I think I just live a tilted life.

 It took me quite a while to make these, but I imagine that I could get much quicker over time.   I will find out, I am planning on making a second pair.  

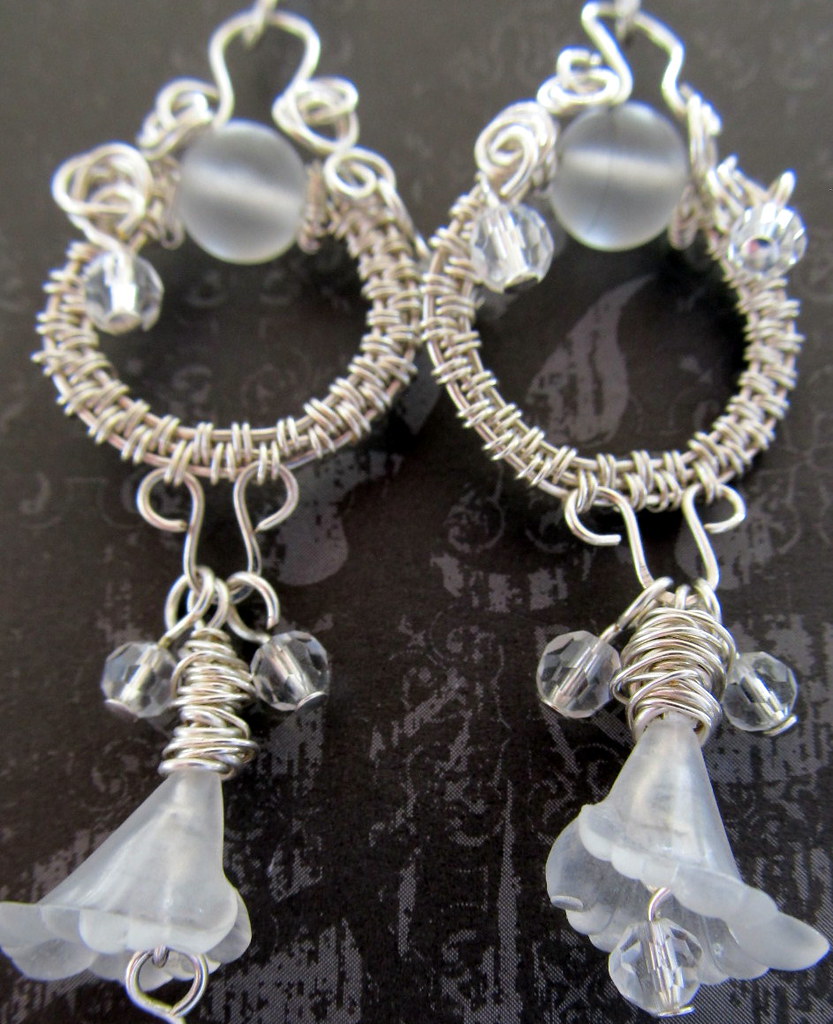
Darling Dangles Earrings view II

Darling Dangles view III

One final picture. 


If this is something you would like to learn I do encourage you to visit Niccole's site and give it a try. 

Sunday, February 16, 2014

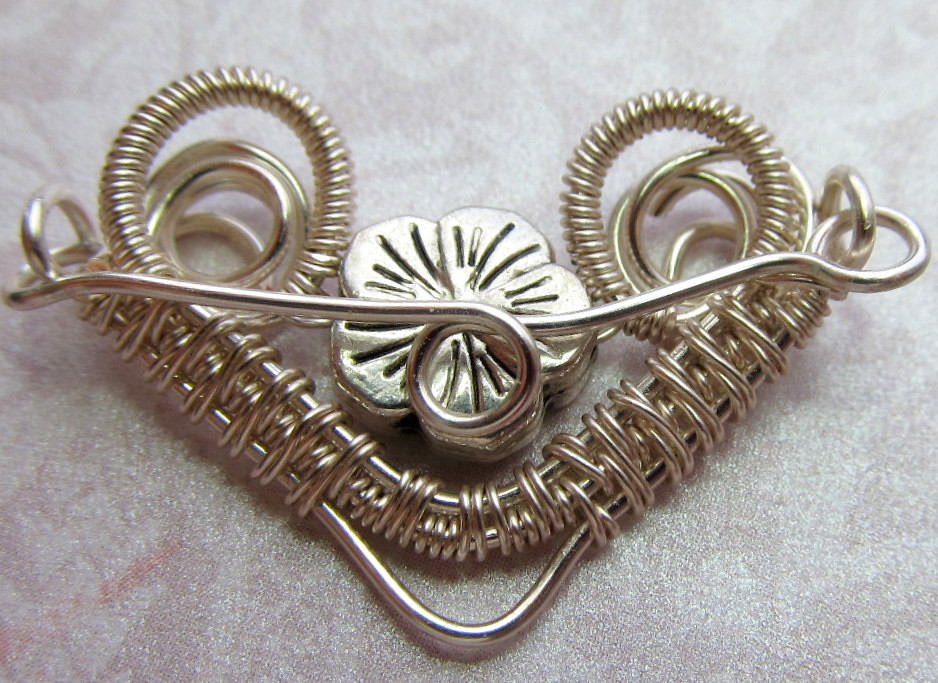
It's A Clasp

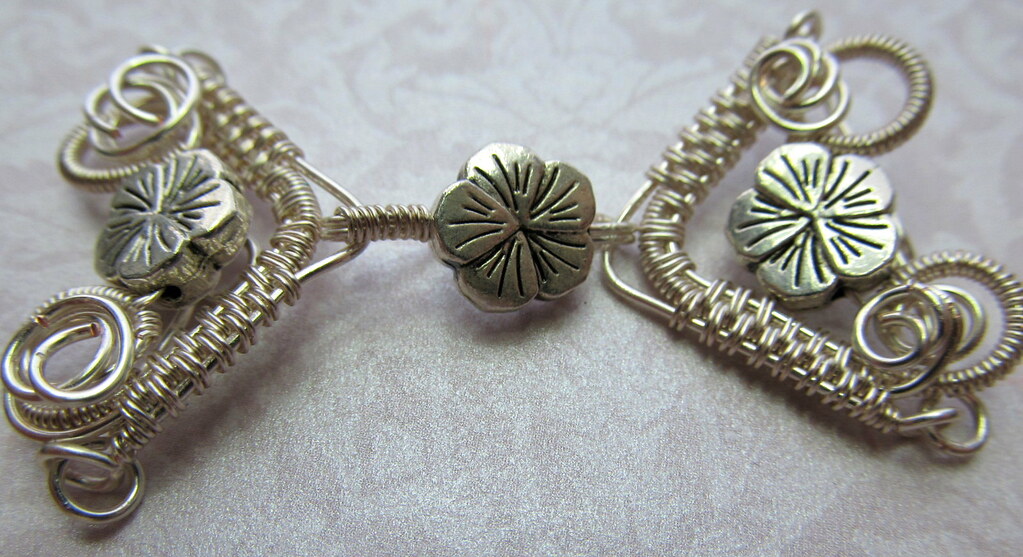
It's A Clasp

I feel like I cheated.  This is not what I envisioned. However, it works.

Okay, so why do I feel like I cheated? Because I bought some tutorials from Nicole Hanna.  This clasp is a very slight adaptation from her Hang My Heart Earrings.  

Here is a bad picture of my first attempt at her tutorial next to half of the finished clasp:
Side by side results

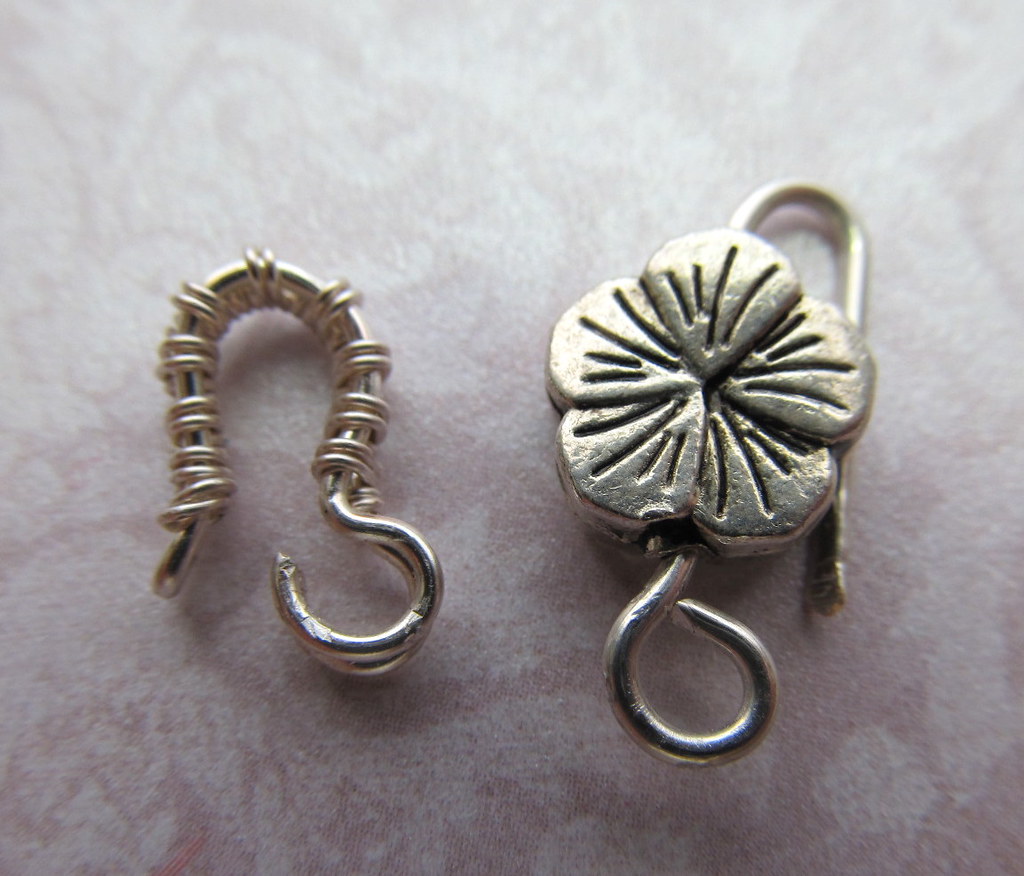
Alternate hooks

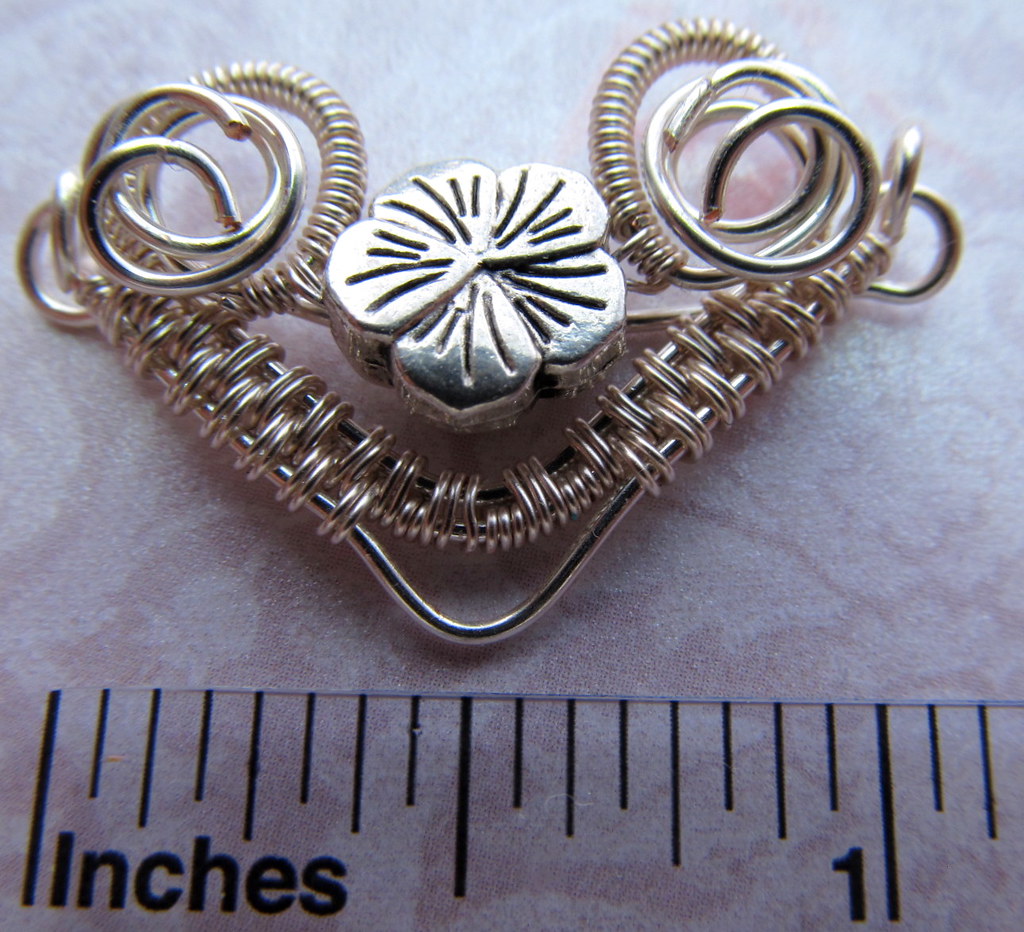
I used larger wires and added a few more weaves to compensate for the larger wires.  I also only used the central element of her earring design.


I fabricated three different hooks for the clasp.  I am not going to keep the hook in the picture at the top of this blog; I think it is too weak.  Instead I will use the hook with the flower embellishment pictured to the right.

I like the hook with the weaving but it is far from smooth when actually trying to hook the clasp.


I have been considering constructing my own findings for years.  I was pushed into doing more than mere contemplation by Cindy Wimmer's The Missing Link book and the lack of a multi-strand clasp for the necklace I am making.

I think I made a mistake when my first attempt at making a wire woven clasp was for a multi-strand necklace.  A simple single strand clasp or a toggle and bar clasp would have been a better choice at this stage.  Nonetheless, I am happy with the results.  Here is the serviceable but not quite so pretty back:
The multi-strand back


One more picture for the blog with a ruler to give you an idea of the size.

Some final thoughts:
  • I want more practice- especially with those curls. 
  • I want to do more design, but that requires better skills and more practice.  
  • Tool marks are like thread, they really show up in pictures more so than to the unaided eye.
  • I want to keep doing this.   
Oh, and all errors are my own and not a reflection of the fabulous work and tutorials of Nicole Hanna.

Sunday, February 9, 2014

Still Experimenting

At least snow days are good for experimenting on creating multi-strand clasps.

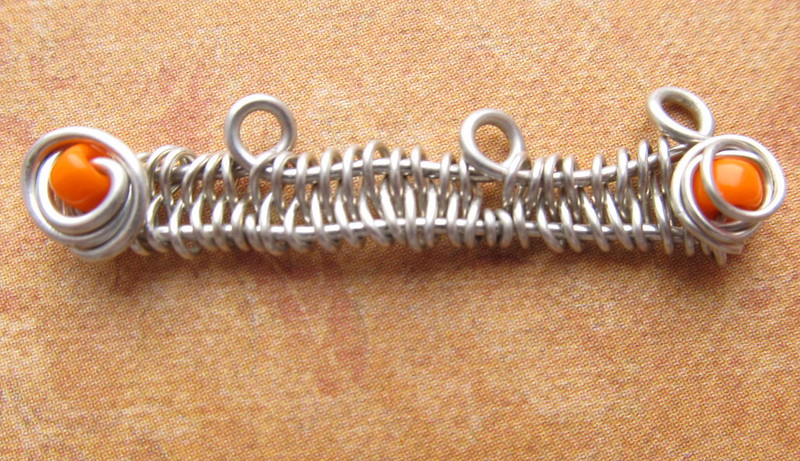
Here is my best try:

Almost There
I think this will eventually work.  However, it is just a part of what I envision the clasp to be. 

Although photos show every little imperfection, I need more practice to get the weaving more even.  I also  need more practice at weaving into the loops. I suspect I might need to go to a three or four base wire weave.  In other words I still have a lot of experiments ahead but I do feel like I am making progress. 

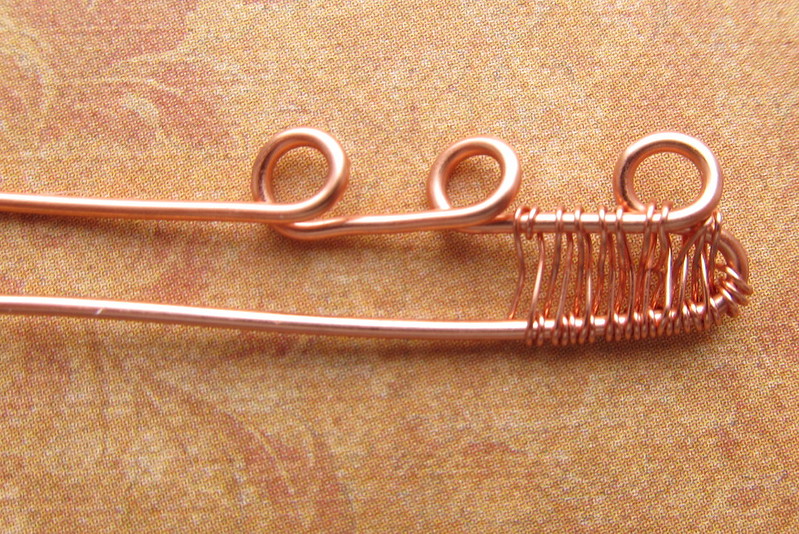
Let me show you another test piece:

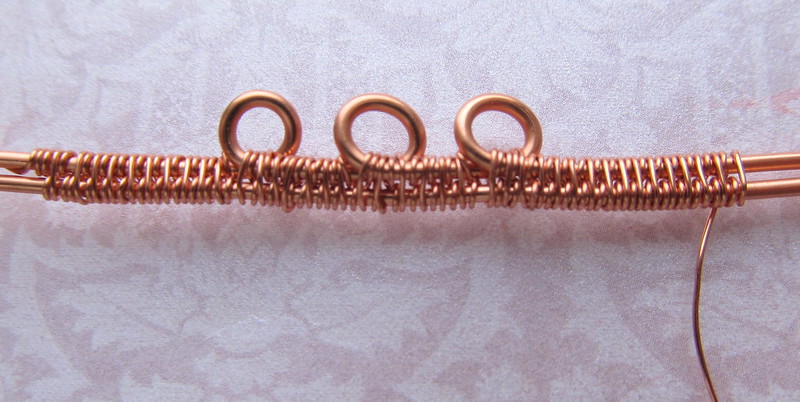
Multiple Experiments
There were lots of experiments going on here. 

From the right to left  let me walk you through the process.

The loops on the right were made after the weave was started.  Not a bad option, and maybe it is my just my skill set, but the I could not keep the base aligned. 

As you can see, the loops in the middle are jump rings.  This was a good idea but I could not get the jump rings evenly sited on the base wire.  You can see the one on the right sits lower than the one on the left.

The non-loop on the left was another good idea but it just seemed unworkable when I tried it.  It could be that it was at the end of a day of experiments and I was tired. 

All these thoughts are good.  I need more practice wire weaving. I also need to figure out further embellishments to draw the eye away from what is inherently uneven when adding loops. 

What I have not mentioned so far is this does not include the hook and eye part of the clasp.  This part of the experiment is just to add the strands to the clasp.  I think I had better start practicing the three base wire weave and perhaps a four wire base, I might just need all those wires to pull this off.

Sunday, February 2, 2014

Experimenting

Have I ever mentioned that I think clasps play an important role in finishing your jewelry?  That a clasp can make or break a piece?  That a clasp should reflect your piece in weight, content, and style? 

I think I have failed to mention that I never have enough clasps in my stash.  I particularly do not have enough multi-strand clasps.  I do not have a single multi-strand clasp in anything other than sterling.  With all of my beads I still need more clasps.

So, I began experimenting. 

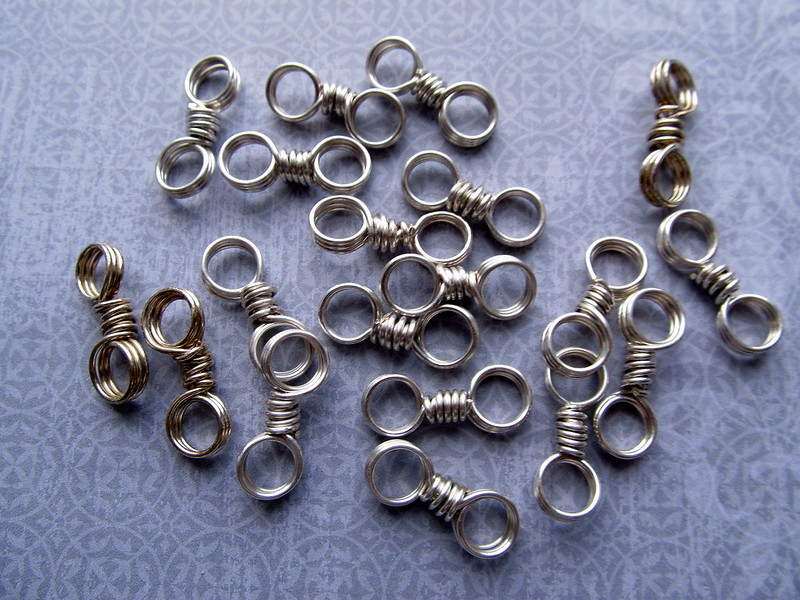
I am working on a multi-strand necklace using these links from "The Missing Link:" 

I am experimenting with making my own clasps.  Promise not to laugh?  Here is my first attempt:


Okay, not bad for someone who does not weave wire.  The thought was good, the execution needs a bit more practice.

So, my second attempt:

This one I did not even try to finish.  It was not working. The 16 gauge wire for the base was okay, but the connector loops were not the right choice.

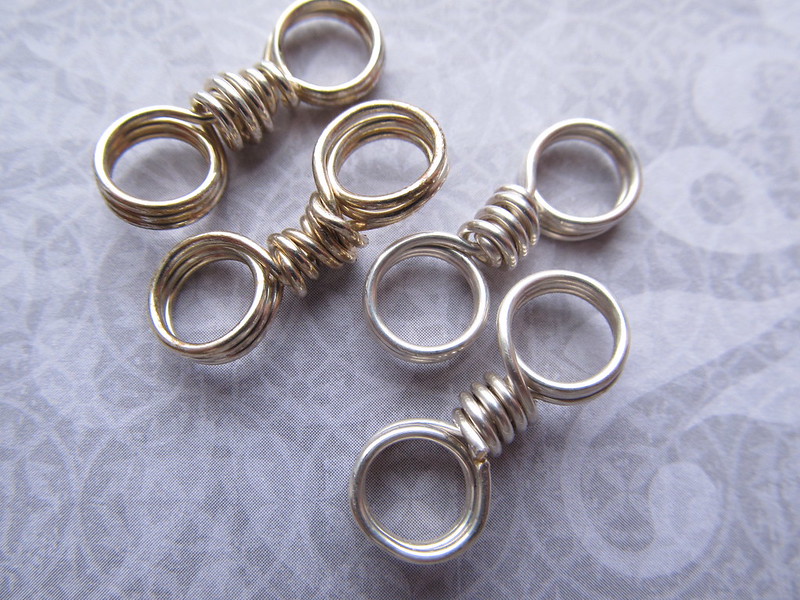
The third attempt was better yet:

Adding the connectors as jump rings was the right solution.  Making the jump rings (furthest left) in 16 gauge was the wrong choice- 20 gauge was a better balance. 

My conclusion, the theory is good, the design is going in the right direction.  Execution needs a lot more practice. 

Practice does pay off.  Take a look at the first two links I did and the final links:

There is improvement.

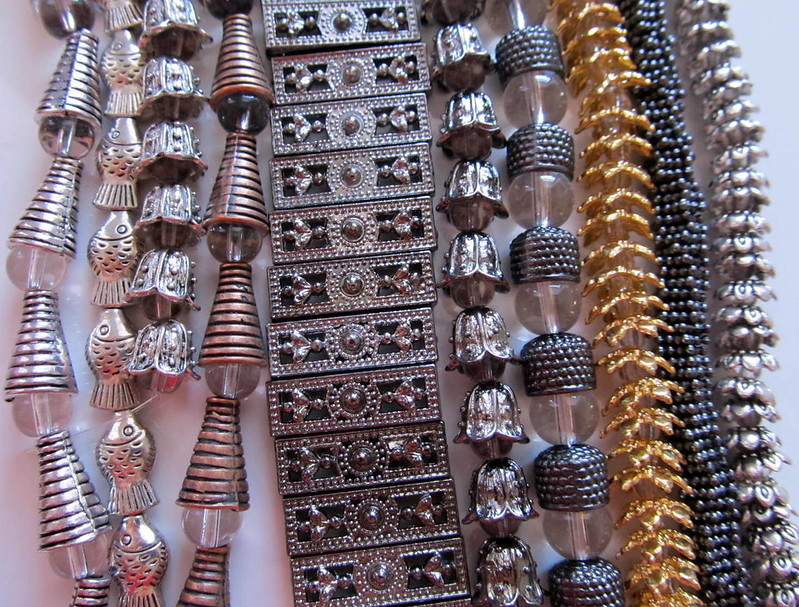
I am going to keep experimenting.  I am going to think some more about design.  I will also see what I have in my stash to put together the necklace without making a clasp.  I am thinking I can use the spacer bars i bought at Beadfest to reduce the strands and use a single strand clasp.  It just might work.

Just in case your interested, the other parts of the necklace include these beads:

If you have any ideas, I would love to hear them.