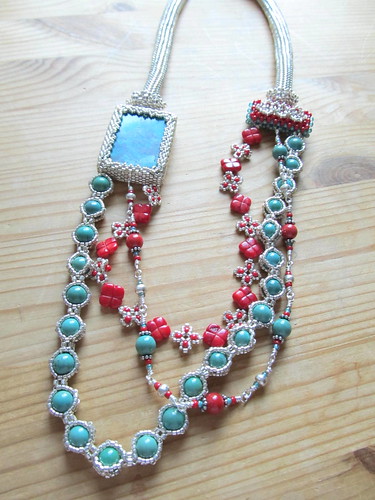
Sunday, August 26, 2012

Tutorial Elongated Embellished Beaded Bead

Last week I told you about eating my words because the plan for the cinnabar bracelet wasn't working.  Lesson 1: Right Angle Weave (RAW) works much better with round beads instead of cylinder beads. 

I designed some elongated beaded beads from a base of Cubic RAW for the cinnabar bracelet.  The first one turned out so well I thought I would make a tutorial to share.

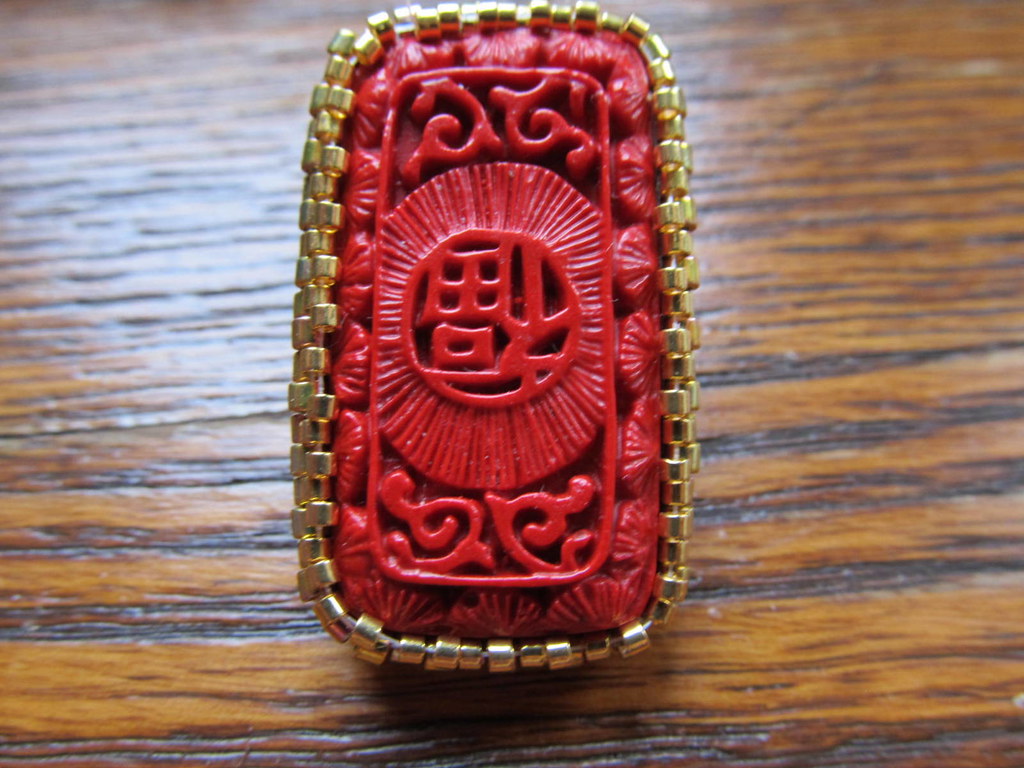
Here are some pictures with the bezeled cinnabar bead.
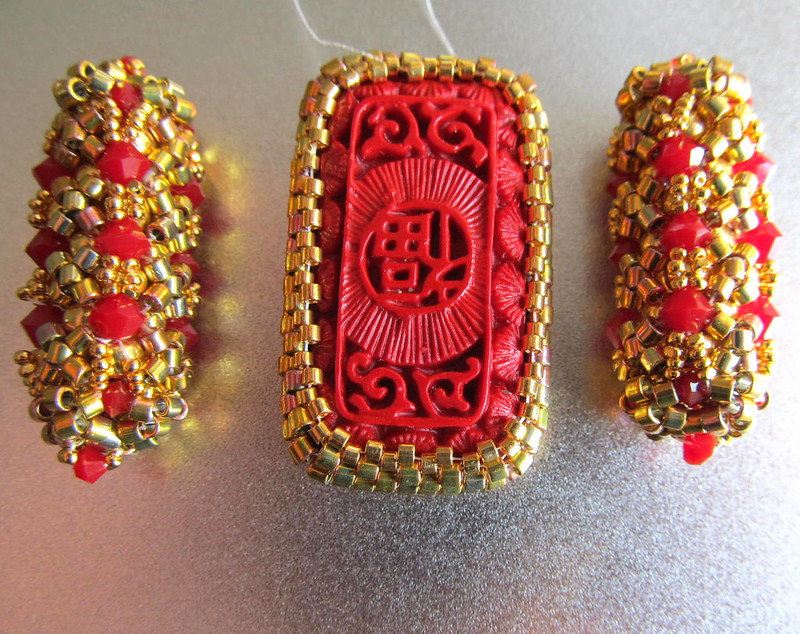
Cinnabar Bracelet Beads Side by Side
Cinnabar Bracelet Beads All Stacked Up

The top of the stacked elongated bead is just a tad different than the picture I took for the tutorial, so you may want to come back to this picture.

All the pictures for the tutorial can be found on my flickr photo stream which can be found here.  I hope this link works, as I am logged in and I obtained the link by a simple cut and paste.  Please let me know if you try it and it fails.

Tutorial for Elongated Embellished Beaded Bead


I used the following beads:
Toho size 6/0 gold colored beads for base
Delica 24Kt Gold Iris size 10/0 (DBM501)
15/0 24Kt Gold Plated Charlottes
12 Swarovski Dark Red Coral 4MM
10 Swarovski Dark Red Coral 3MM (this includes optional top embellishment)
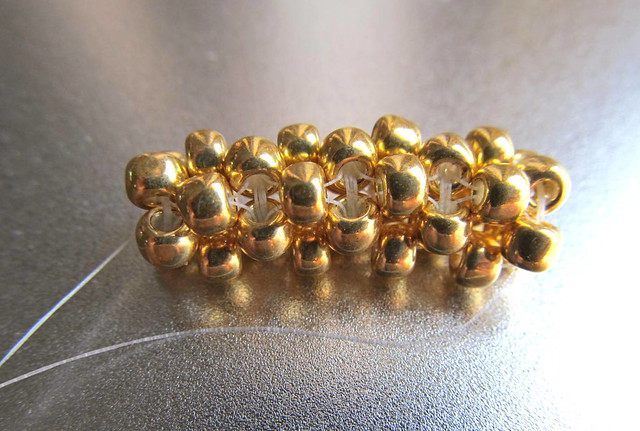
Cubic RAW Base for Elongated Embellished Beaded Bead


To begin, create a Cubic RAW base from the 6/0 beads that is 4 units long.


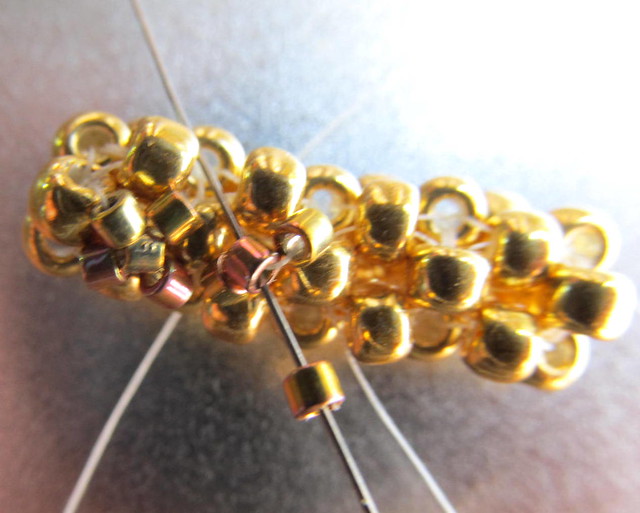
Tutorial Elongated Embellished Beaded Bead Step 2 Beginning X Embellishment


The first embellishment is an X pattern made with the 10/0 Delica beads.  Exit the top Cubic RAW unit and add three beads to your needle.  Crossing to the bottom 6/0 bead of that unit enter through the opposite side.  That is, if you exited the right hand side, enter on the left hand side.  A misstep will be obvious.


Close Up of First Step of X Embellishment


Here is a close up of the first step of the X embellishment.

I used 6/0's and 10/0's because that is what I had on hand.  I am pretty sure this pattern could work with 8/0's and 11/0's which are more common.
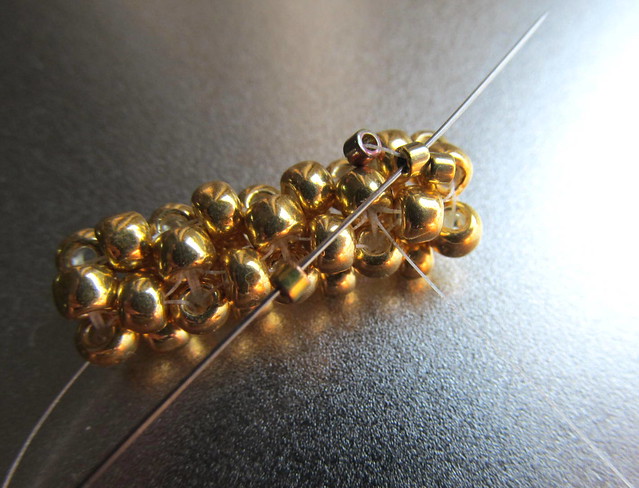


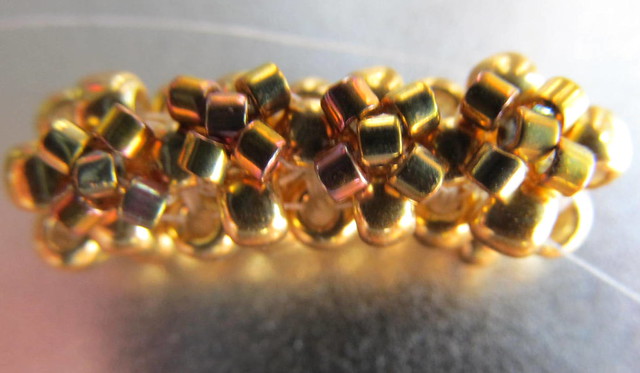
Tutorial Elongated Embellished Beaded Bead Step 3 AKA X Embellishment step 2


Here is the second step of the X embellishment.

Add 1 10/0 and go back through the middle 10/0 you added on the first step.
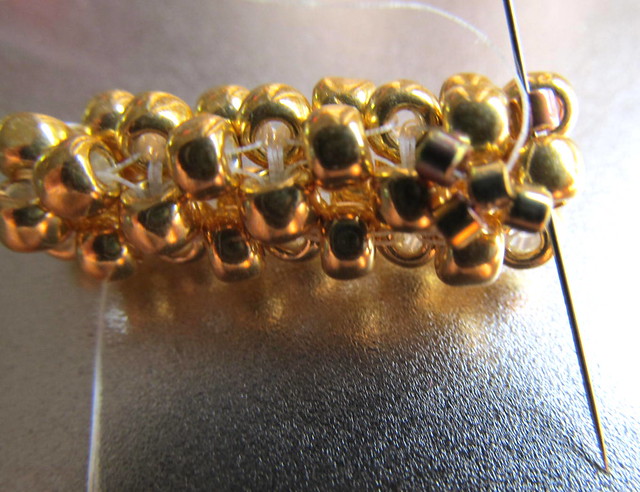


Tutorial Elongated Embellished Beaded Bead Step 4 AKA X Embellishment step 3


This is the best picture I have of this step.

Now add 1 10/0 bead and go back through the opposite side of the 6/0 from where the X embellishment began.  You can just see that added bead underneath my thread.
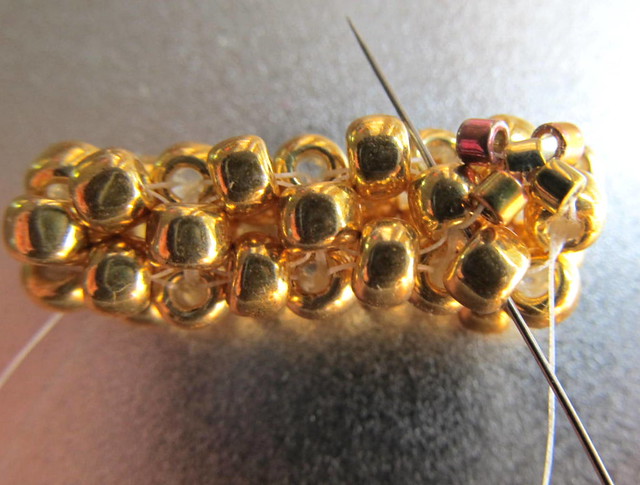


Tutorial Elongated Embellished Beaded Bead Step 5 Thread path to next X Embellishment


The X pattern embellishment is going to be repeated 4 times per row, and then again on all 4 sides.

After exiting the top 6/0 bead you are going to go back through the side 6/0 bead on the underlying Cubic RAW unit and then through the bottom 6/0 bead of the underlying Cubic RAW unit.  This will set your needle at the top of the next X embellishment.


Below are pictures of the second X embellishment and then the completed row.
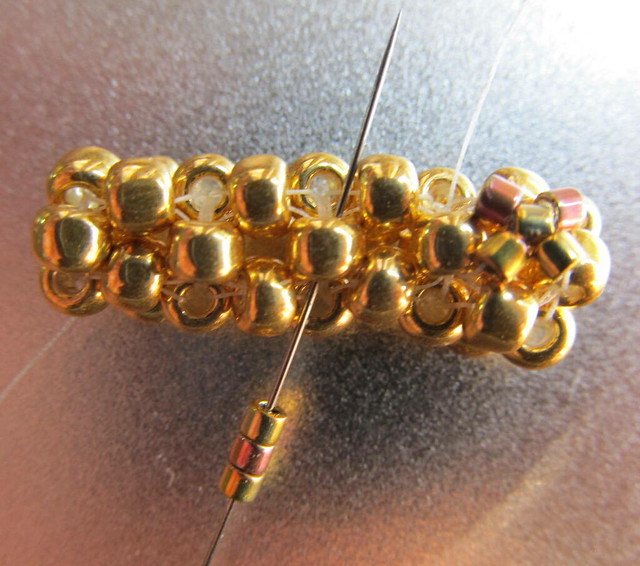
Tutorial Elongated Embellished Beaded Bead Step 6 Repeat step 1 of  X Embellishment
Tutorial Elongated Embellished Beaded Bead Step 7 Repeat step 2 of X Embellishment
Tutorial Elongated Embellished Beaded Bead Step 8 Repeat step 3 of X Embellishment
Tutorial Elongated Embellished Beaded Bead Step 9 X Embellishment Row Completed
Tutorial Elongated Embellished Beaded Bead Step 10a Adding Bicone Row
Tutorial Elongated Embellished Beaded Bead Step 10b Adding Bicone Row


After adding the X embellishments on 4 sides add the 4mm bicones.

Follow a thread path through the 6/0 to exit at a side bead on the Cubic RAW base.  Notice the X embellishments at the top and bottom of the beadwork to the right.


Add a 4mm bicone and go through the next 6/0 bead on the base.  You will repeat this 3 times for each side.


Tutorial Elongated Embellished Beaded Bead Step 10c Adding Bicone Row
Tutorial Elongated Embellished Beaded Bead Step 10d Adding Bicone Row Repeated 4 times


Repeat until you have added 3 4mm bicones on 4 sides of the Cubic RAW base.
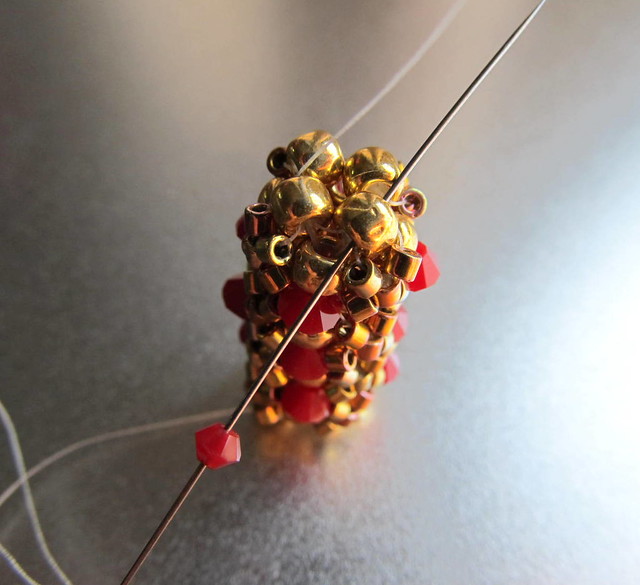


Add 3mm bicone beads between the top Cubic RAW unit.


Tutorial Elongated Embellished Beaded Bead Step 11 Repeated 4 times


Repeat this step 4 times until there is a 3 mm bicone between each of the 6/0 base units.  This is going to be the top or bottom of your bead, or maybe the left/right depending on how you orient the bead.

You are going to repeat this on the other end of the bead.  If you have a long tail end you can add the 3mm beads now, or you can wait until you add the 1st row of 15/0's in the next step.

My pictures are not quite right after this step because there is an additional 10/0 Delica embellishment, which I found worked better if done at a later step.


Exiting out of a 3mm bicone, add 4 15/0 Charlottes to your needle and go through the first 4mm bicone.

NOTE: the next row will contain only 3 15/0 Charlottes.


Tutorial Elongated Embellished Beaded Bead Step 15 Adding the Charlottes Row


Add 3 15/0 Charlottes and go through the next 4mm bicone.
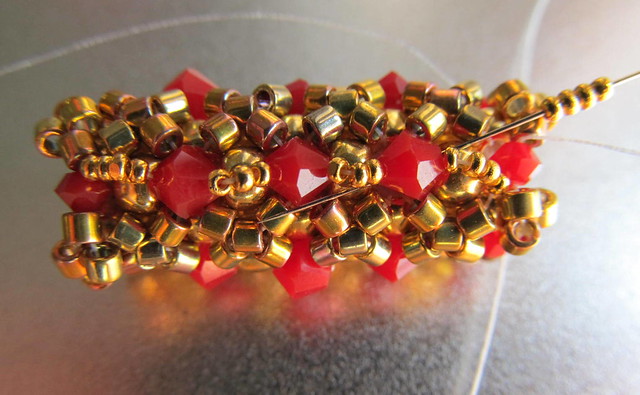


Tutorial Elongated Embellished Beaded Bead Step 15a Second Row


The pattern between the 4 mm bicones is 4 Charlottes, 3 Charlottes, 3 Charlottes, 4 Charlottes.

At the top/bottom, go through the 3 mm bicone and add 4 Charlottes and repeat. 
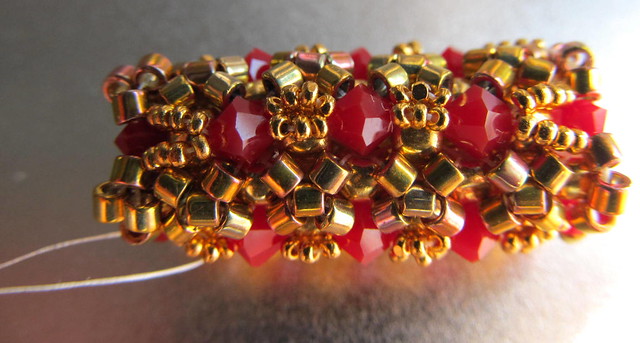


Tutorial Elongated Embellished Beaded Bead Step 15b Repeated 4 times


Add the double row of Charlottes on all 4 sides of the Cubic RAW base.
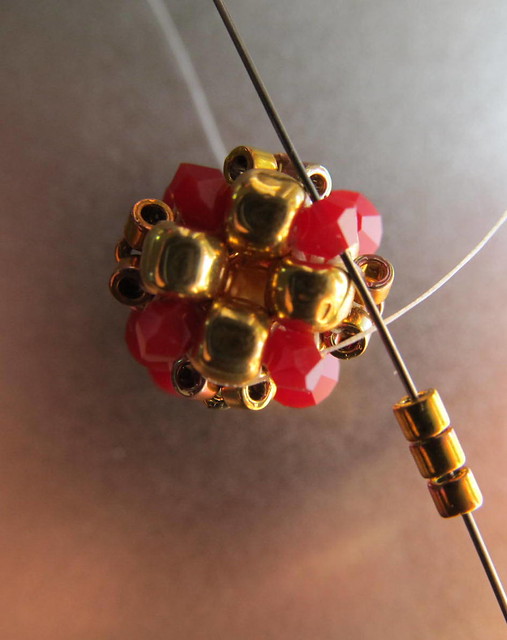


Tutorial Elongated Embellished Beaded Bead Step 12 Embellishing the Top


Now to embellish the top.  This is the step I have out of order on my photography.  I had done this step earlier when photographing my tutorial; the weaving is easier if done at this stage.

Exit from the 3mm bicone and add 3 10/0 Delicas.  Go over the 6/0 base bead and enter the next 3mm bicone.


Tutorial Elongated Embellished Beaded Bead Step 12 Repeated


Repeat the 3 10/0 Delicas 4 times.


Tutorial Elongated Embellished Beaded Bead Step 13 Beginning the Netting


This step begins the netting for the top/bottom (or left/right) of the bead.

Exiting out of the 3mm bead, enter the 1st 10/0 Delica and add 1 10/0 Delica.  Enter the 3rd 10/0 Delica.

Once you have exited the 3rd Delica, enter the next 3 mm bicone, then the first 10/0 Delica on the other side of the bicone and add the next 10/0 Delica, keep repeating.

This picture is only through the exit of the 3rd Delica. 

 
Tutorial Elongated Embellished Beaded Bead Step 16 Netted Top


Repeat the above step 4 times so each bicone has 4 10/0 Delicas between them forming a diamond pattern between each bicone.

Go back through the next bicone, and retrace your thread path to exit at the top 10/0 Delica.  Add 3 10/0 Delica's and enter the next top 10/0 Delica.  In other words, exit the 3mm bicone, add 3 10/0's count 1 10/0 Delica, 1 3mm bicone, 1 10/0 Delica and enter the next Delica.

Repeat 4 times.
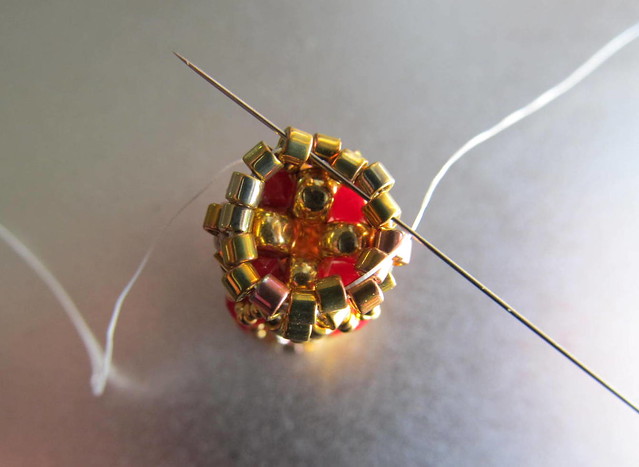

Tutorial Elongated Embellished Beaded Bead Step 17 Netted Top Pulling it Together


In this step you are adding no beads, just tightening the netting.  Your needle is going to go through the middle beads of the last rows you finished above.


Tutorial Elongated Embellished Beaded Bead Step 17a Netted Top All Pulled Together


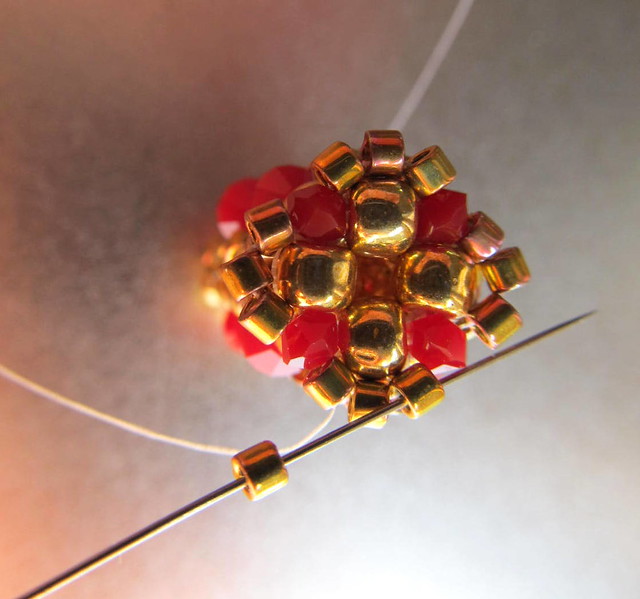
Now pull your thread tight and you can call it done, or you can add one more embellishment depending on how you want to use your beaded bead.


The final embellishment is a 3 mm bicone.  This picture is not quite accurate of my finished piece.

This is a final X pattern.  Exiting out of a 10/0 Delica, add 1 Charlotte, 1 3mm bicone, 1 Charlotte and enter the opposite 10/0 Delica from the side opposite that which you exited the 10/0 Delica on the other side.  Gesh, that is confusing.  Put simply, you are making another X.

Now add 1 Charlotte, back through the 3mm bicone, add 1 Charlotte, and back through the original 10/0 Delica. 


I did not add the Charlotte the first time I did this and had too much exposed thread.  Thus, the picture is not accurate and you should look at the finished piece at the top of this post.

Here are the elongated embellished beaded beads nearly done with different ending embellishments.


*sigh* this took me all day and I am anxious to hit "publish."  No doubt I will read over this a week from now and realize how I could have polished it more.  Nonetheless, I am going to publish this.  If you try this beaded bead and run into issues, let me know and I will do my best to clarify. 

Sunday, August 19, 2012

Eating My Words

I said: The reorientation is the only untried part of this bracelet.

I should have known better.  I have spent many hours this morning working on a rectangular beaded bead just like the reduction bead I used for the Turquoise Slab Necklace.  All to no avail.

RAW Not Working

That beaded bead has a right angle weave (RAW) base.  I just cannot get my 10/0 Delicas to work.  I think I need regular seed beads. 


This is my third attempt! Nothing was aligned.  The sides were not straight.


Failed plans, a different approach
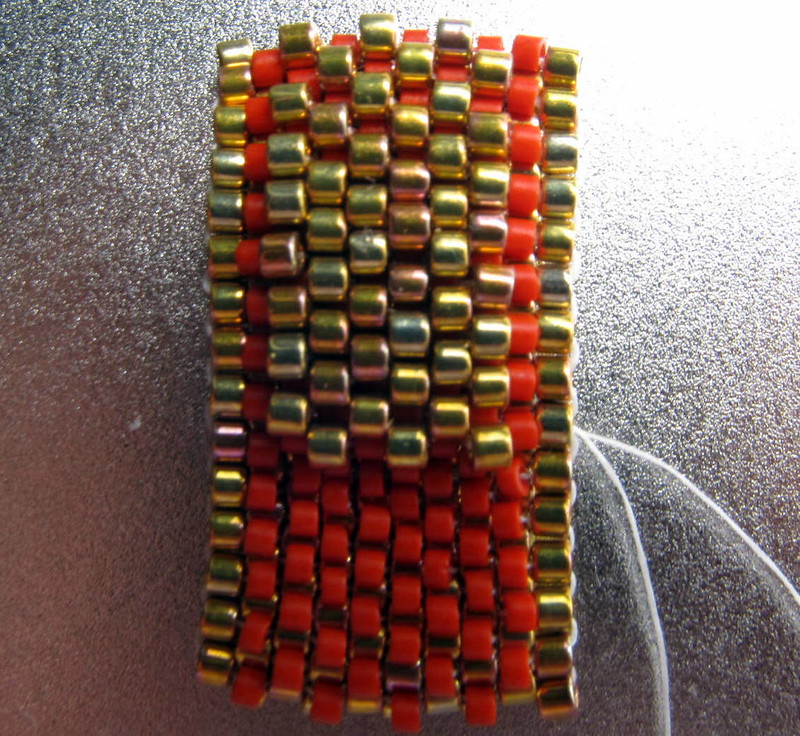
I wanted a rectangular layered beaded bead to place next to the bezeled cinnabar bead.  I went back to my favorite stitch- Peyote.


This isn't quite right either.  I want to see more of the red showing through the gold.  The picture does not show that the ends are curled under.

I actually thought about a quick trip to the craft store to buy a square wooden base.  But, that is not the solution I am looking for.


Possibilities


The curled ends did inspire me.  Expect something layered and rounded.


Maybe the many hours referenced above is a bit of an exaggeration.  It has, however, been hours.  Does everyone else go through this or is it just me?

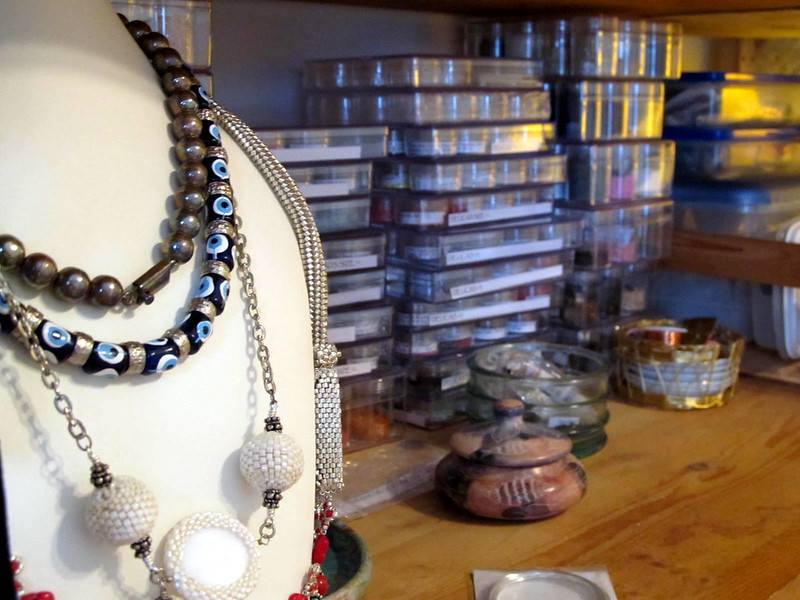
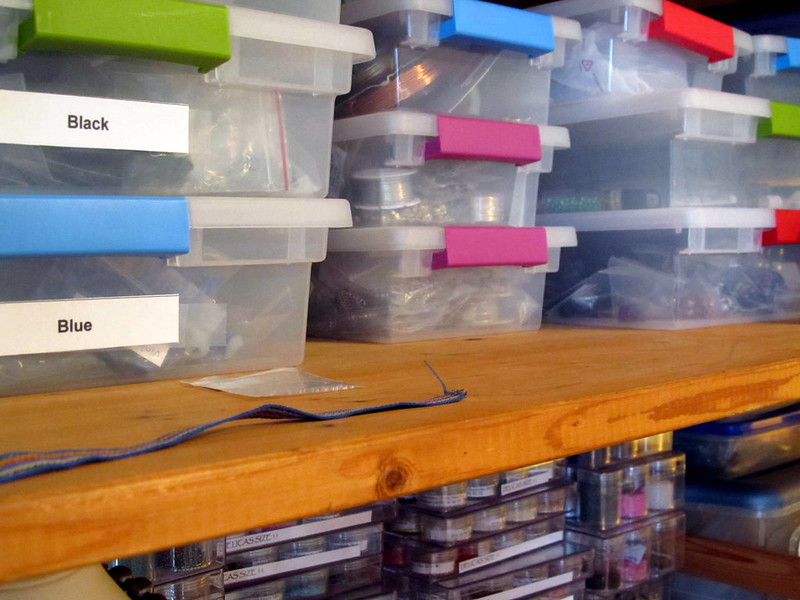
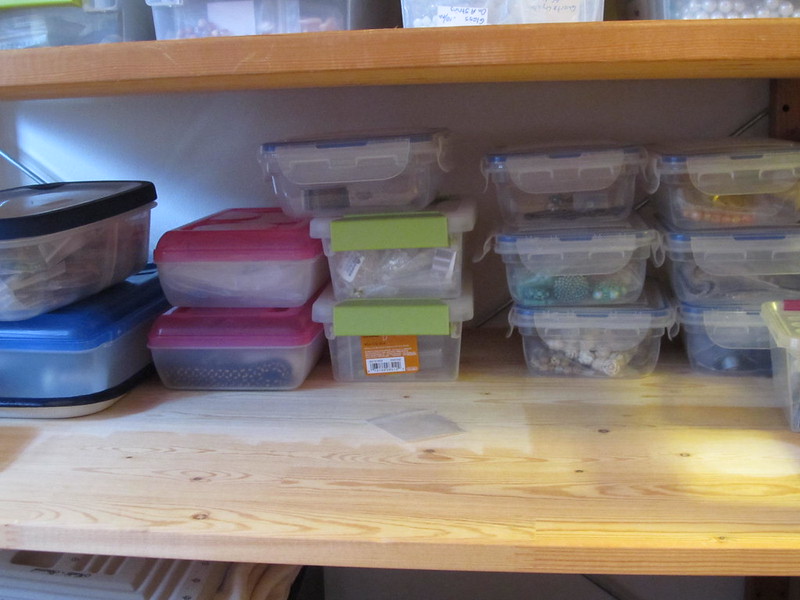
While I was working this morning I did snap some pictures of my bead table and work space.  Since I am fascinated with where everyone else works, I thought I would share.
Bead table- my actual work space, minus the dirty napkin.  I watch shows on my computer as I work on my jewelry.


Bento box tray for the current project
Bead table and work space the overall view
Seed beads
Large colored beads, wire, findings and unsorted seed beads
More large colored beads, a box of perals, and a box of small swarovski crystals
Project boxes

Sunday, August 5, 2012

Plans

The bracelet I am currently working on is not a big project.  The elements are weaves and connections that I have done previously.  I had planned finishing the bracelet this weekend or next weekend.  Of course when you make plans the universe laughs; at least this time it is with joy and anticipation.

The job that I want in the location I want has just posted and I have to get my application in today.  I have family visiting next weekend.  My beading time is what is available to cut to finish the application and get my home sparkling clean and well organized.

I have made some progress.  Here are some pictures.
Bezzeled Cinnabar Solo Top View
Bezzeled Cinnabar Propped Side
Bezzeled Cinnabar Top View with Secondary Beads
I am absolutely loving the gold and red.

I have not clipped the threads on the bezel yet because I am not sure if I am going to get rid of the last row of 15/0.  They overlap a bit further than I would like onto the top carving.

I am going to orient the cinnabar with the narrow side to fingertips and elbow, wide side to the left and right of the wrist.  The hole in the cinnabar runs through the narrow sides, that is, it is oriented wrong for the bracelet design.  I need to run the thread back through the side beads and through the drilled hole to firmly anchor the bezel.  The reorientation is the only untried part of this bracelet.

See you in two weeks.

Sunday, July 29, 2012

New Project

I don't know about you but the hardest part of each project for me is picking out colors.

Last week a friend of mine did a blog post about mood boards and I commented that I do not create mood boards or design boards.  Instead, I go through my beads and pull out what I think is appropriate for the project that I have in mind.

My next project is going to utilize a long cinnabar bead as the focal for a bracelet.  It will also include 24 kt gold iris Delicas.  Those are the only certain choices.

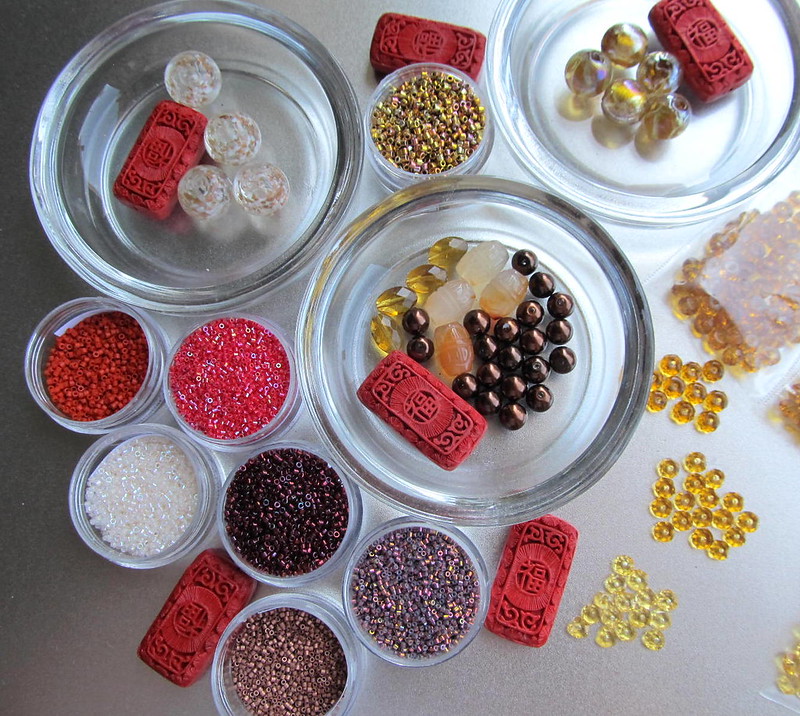
Here are all the starting choices:
Big mood board for cinnabar bracelet project

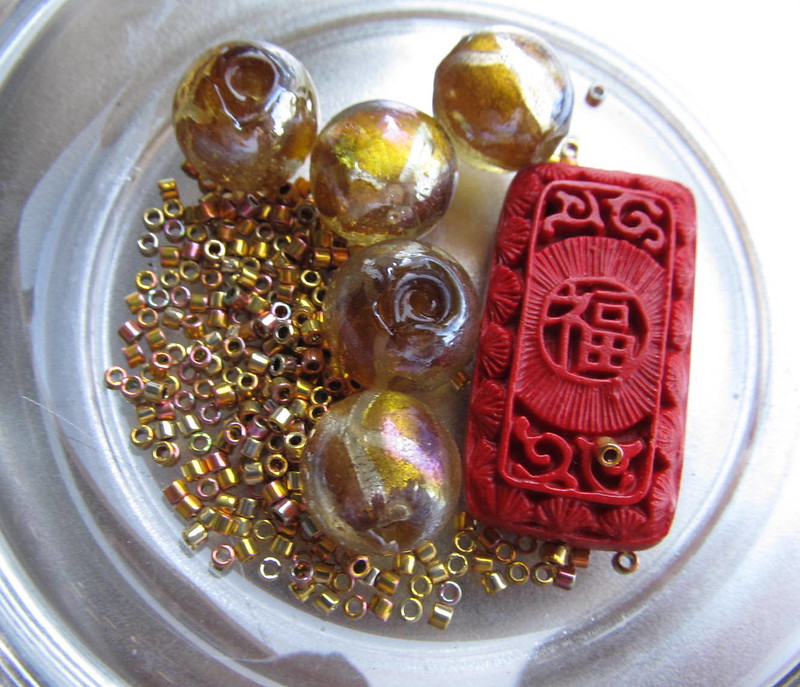
As I stated the only choice is the cinnabar and the gold iris Delicas.  Then, I need to make a choice between two secondary beads.  Here is the first option:
Secondary Bead with Delicas Cinnabar Mood Board Choice 1
I really like this option.  I like the gold foil in these beads, I like the visual texture, and I like the size.  This is likely to be my choice.

There is, however, a second option:
Secondary Bead with Delicas Cinnabar Mood Board Choice 2
It is difficult to tell from this picture, but these beads are mostly clear with clouds of gold dust and white swirled throughout.  The gold in these beads are a bit more visually delicate and will likely be a nice balance against the rest of the bracelet.

Both choices are viable.  I will make up my mind when I am ready to add them to the bracelet.

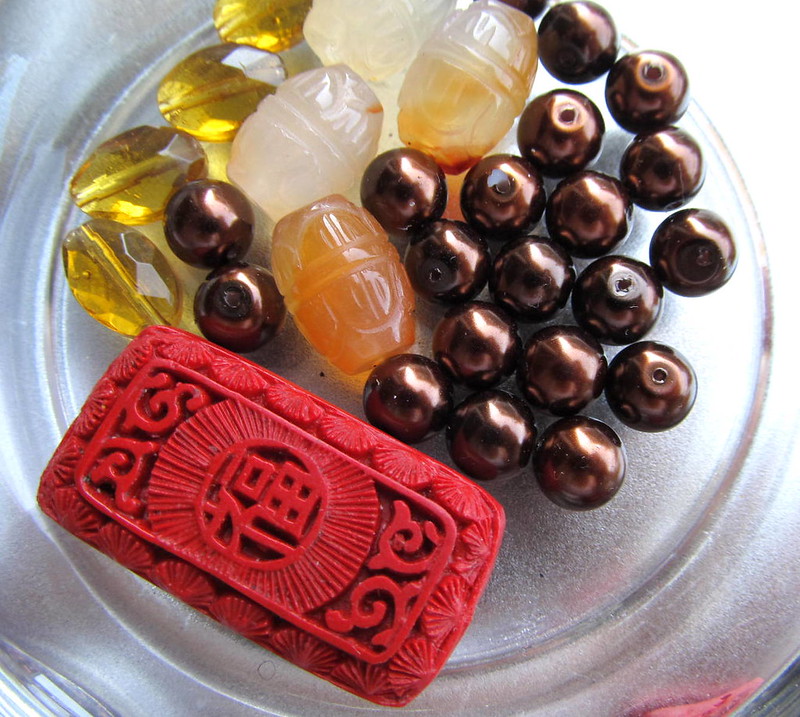
Planning ahead, I may be in need of a tertiary bead to round out the bracelet.  Here are my choices:
Tertiary Beads Cinnabar Mood Board

In this set of choices, I like the jade barrels, they pick up on the mood of the cinnabar focal but I don't think the color is going to be quite right.  The crystals are nice, but I think are a bit to yellow.  Finally, I am leaning toward to dark bronze beads.  Again, all options remain viable and I will make a choice if it becomes necessary.

Of course, there are going to be additional seed beads.  The gold iris beads are in the center of the picture below:
Delicas Cinnabar Mood Board
This is going to be a more limited choice.  The gold iris beads are a size 10.  I need to make two more choices, an 11/0 and a 15/0.

Finally, I do not have all that I need for the finished piece.  I need a gold tone clasp and some chain.  I need the chain because I want this bracelet to be adjustable in length.  *sigh*  You would think with all the beady stuff I own a trip to the bead store would be unnecessary.

Sunday, July 22, 2012

Something Quick and a Shopping Tip

Somewhere in the midst of creating the Turquoise Slab Necklace I said I was going to make something simple, or was that fast?


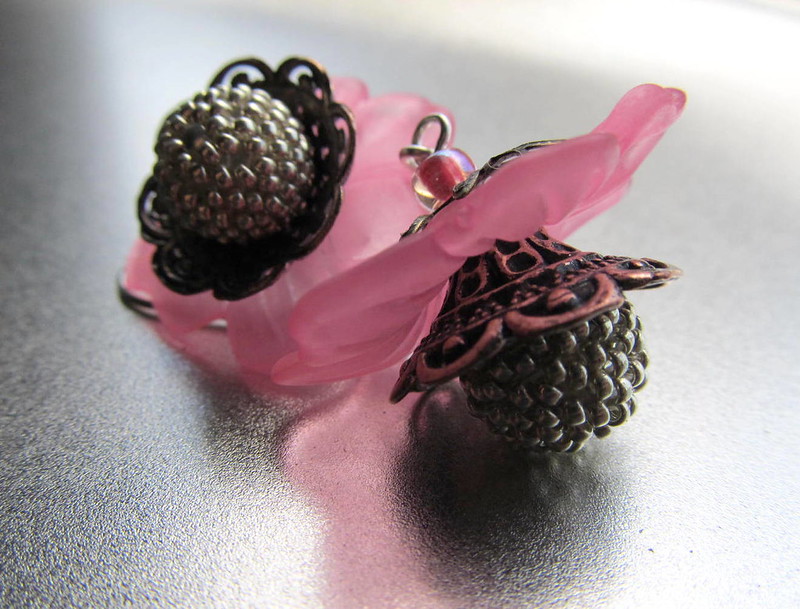
You may recall these earrings made from test beaded beads somewhere in the process of the Turquoise Slab Necklace.


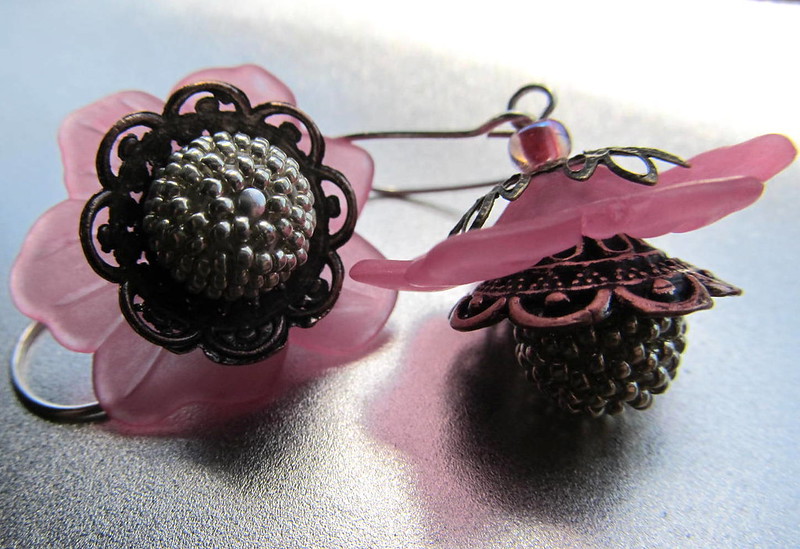
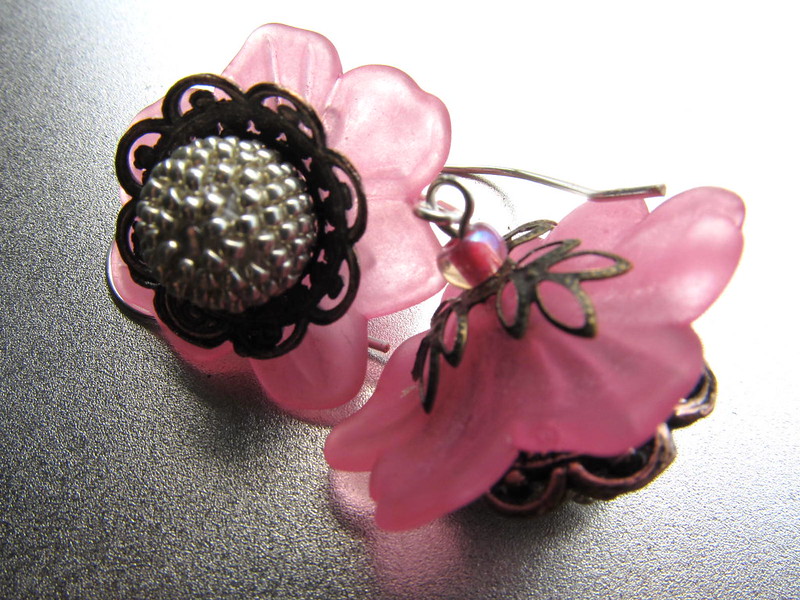
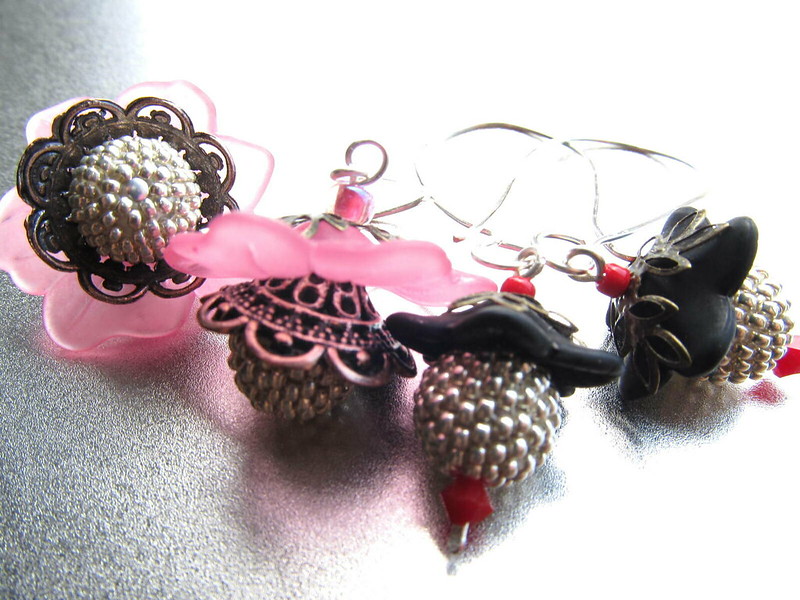
I really liked these.  Thus, I am repeating the design with left over beaded beads and additional Lucite flowers.
Pink Lucite and Silver Beaded Bead Earrings
Another view Pink Lucite and Silver Beaded Bead Earrings
Top View Pink Lucite and Silver Beaded Bead Earrings
Side by Side Beaded Bead and Lucite Earrings


Shopping Tip:  I am out of Fireline.  I use 6 lb Fireline for my bead weaving.  I never buy Fireline at a bead shop, it is too pricey.  I have been buying Fireline at K-Mart where you can get 150 yds for about $17.00.  (It is with the fishing gear)  Yesterday K-Mart did not have what I wanted.  This morning, I  ordered 300 yds of Fireline on Amazon for about $24.00 + shipping. 

Sunday, July 15, 2012

Kreativ Blogger Award

I was delighted when Lynsey, of Musings of the Unicorn, gave me a Kreative Blogger Award.


I thanked her in comments for her generosity and then told her it would give me something to blog about today. Then I began to think about the fact that as a recipient I need to name 10 other deserving bloggers- how the heck can I do that when I subscribe to hundreds of blogs? I decided what I would do is try to pass along an artful link to a blogger with less than 100 followers or to a blogger that you might find helpful that is not likely to popup on your radar. 

The rules of this award are as follows:
When you receive this award, there are a few rules:
1. Post a link to the person who awarded you
2. Share 7 well-thought out random things about yourself
3. Award to 10 other deserving bloggers and let them know

7 well thought out random things about myself:
1.  I read.  Now I don't just mean I have that skill, instead I mean that I am a passionate reader.  I think I would read to the exclusion of just about everything else if given the opportunity.  The books I read for pleasure are Science Fiction and Fantasy.  Need a good book? just ask.

2. I read political blogs.  I am an avid follower of politics.  I also know that when talking politics the person on the other side of the conversation has to be willing to engage, articulate, and able to put politics aside in order to keep the peace.

3. I am well educated.  I have three college degrees, none of which involve art.

4. I love to eat good food so I cook.  I follow food blogs.  I shop farmer's markets and small local shops when possible.

5. I love Native American art.  This is how my love of beaded jewelry began.  This is also why I know how to spin wool.  One of my long term goals is to make a Navajo style rug beginning with spinning the wool, using natural dyes, and building the loom which is a necessary step for this type of weaving.

6. In my professional life I tend toward positions that are in the public interest.

7. I dream, and here we are talking REM Sleep, vividly.  My dreams are extraordinary.  I sometimes share my dreams and people seem shocked at the breadth of my dreams and the details which are so far from their own experiences. 

Ten Blogs you should look at:
1) Olive Blogs.  I had intended to limit myself to blogs with less than 100 followers, but then I would not have been able to mention Olive to you.  Cat, who writes Olive Blogs was my first follower, just because I happened to mention to her that I had just started a blog.   That, however, is not the reason why I am mentioning her.  I list this blog because it is a pleasure to read, it makes me laugh often, and I get really good business advice from her.

2) Nicole Hanna Jewelry.  Nicole has not been an active blogger of late, but I am listing her anyway.  Nicole is another blogger who almost always makes me laugh, or at least smile. She also does fine wire work and writes great tutorials.  Maybe some day I will take up wire work for more than wrapped loops and simple clasps.

3) Another Country Beadworks.  I have given special mention to this blog before.  Morwyn has a great eye for design.  She also works with seed beads so what is not to love?  In addition, she recently gave up on her Etsy shop so be sure to put her blog into your reader so you do not miss her new creations.

4) Bizuteria by Dominikana.  More wirework to inspire you to something new. 

5) Pérégrinations de perles. This is not an English blog.  If you like seeing the process of how a piece is made add this blog to your reader.

6) Torque Story.  This blog has one of my favorite features: I Might Make that Monday.  How many of you do not have a long list of things you might someday get around to making?  This is a wonderful read.

7) Luann Udell.  I know Luann has more than 100 followers.  I also bet she is not in your list of blogs.  She is a great writer and pushes you to see yourself.  Plus she makes these really fabulous beads. 

8) Gabriella Gyongyblogja.  Another non-English blog, another creative beader.  Gabriella is worth keeping an eye on.

9) Créations laure : Bijoux fantaisie.  Laure does not have a list of followers.  I am pretty sure it is beyond my 100 count limit.  I am also pretty sure that many of my regular readers have not discovered her.  Laure writes complex multi-part free tutorials for seed bead weavers.  She is creative and generous.

10) Must Haves Jewelry.  Linda works with PMC, silver, and gemstones.  Not anything I do but certainly inspirational. 

Okay, that was hard.  To all you bloggers out there that I love and read regularly you were not forgotten just not quite within the lines I set for myself. 

One more link.  One of my decorating blogs had a great link to this artist:
Andrea Posada
Take a look at this beautiful work and be inspired.

Sunday, July 1, 2012

Done, Done, Done

Pictures only today.
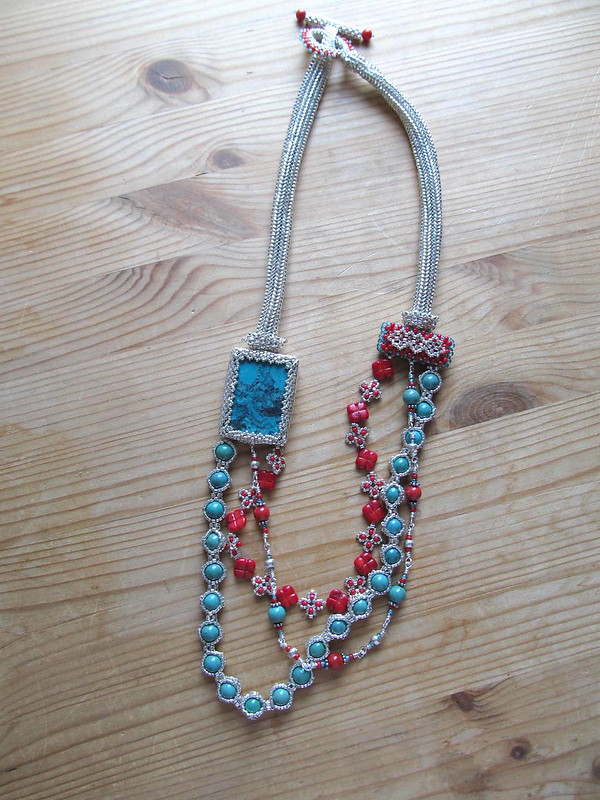
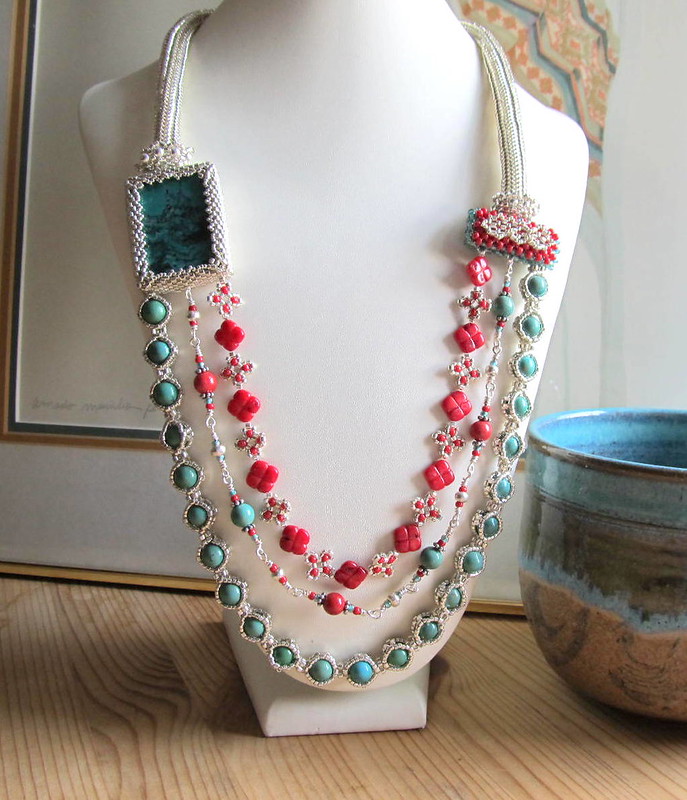
Turquoise Slab Necklace Completed
Clasp at work
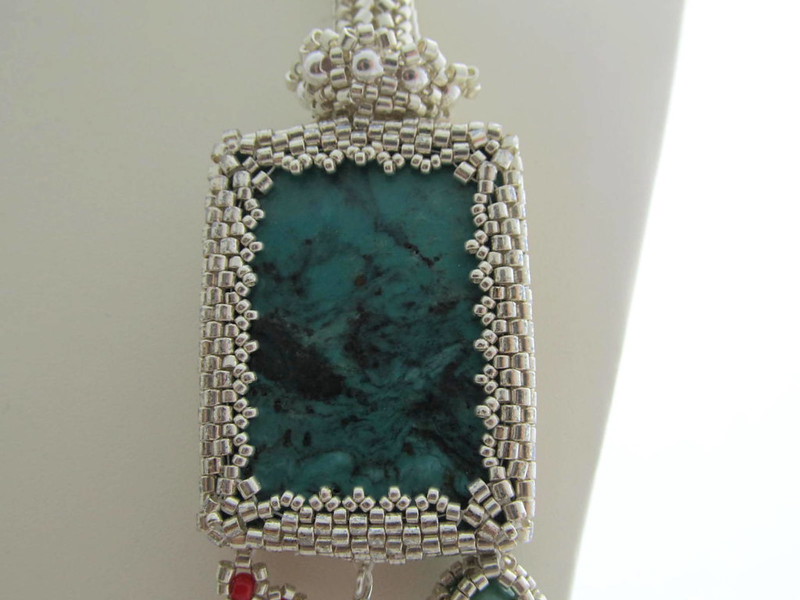
Turquoise Slab Focal
Reduction Bar Side 1
Reduction Bar the Other Side (Note this is on the bust with a white back ground, the picture was not cropped oddly.)
The Turquoise Slab Necklace
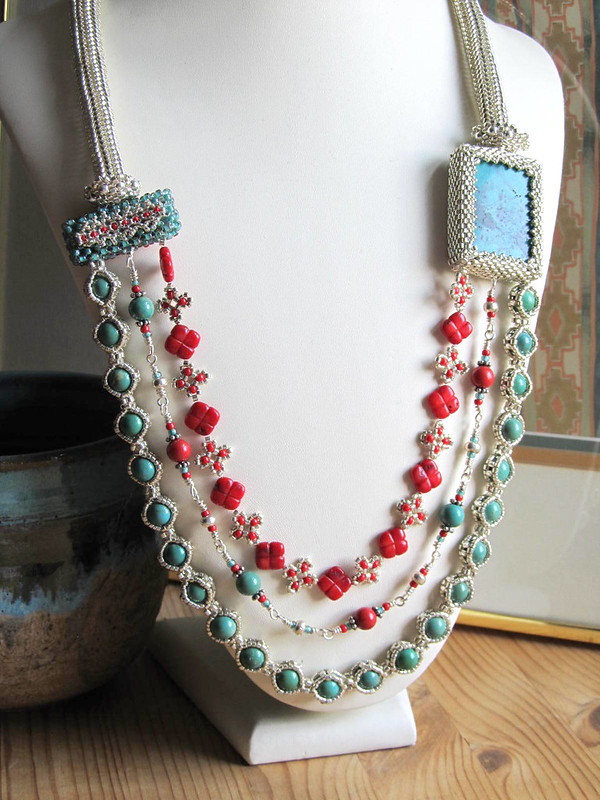
Another view
Again
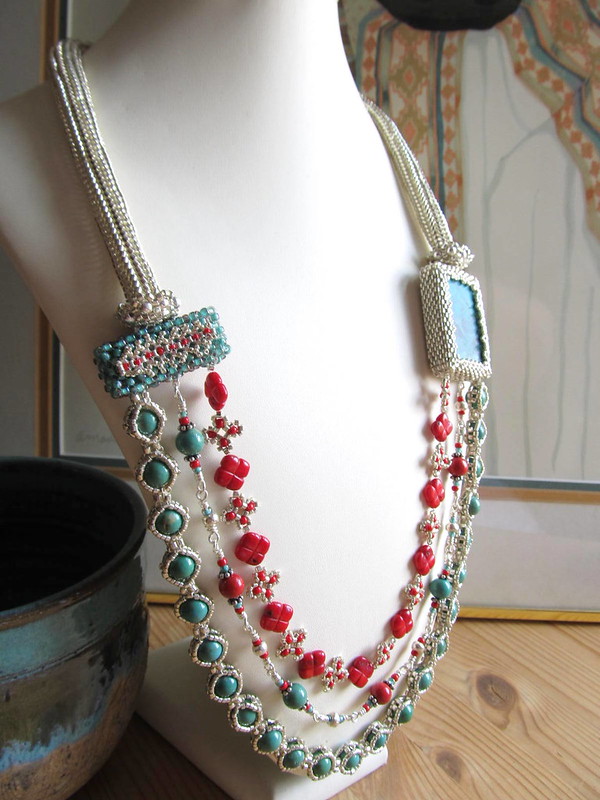
Another picture
Turquoise Slab from the side
Last one