Showing posts with label Photography. Show all posts

Sunday, April 3, 2011

If at first you don’t succeed…

keep trying.

I read this great article on studio quality photography using aluminum foil.  I immediately embraced the methodology described and placed my jewelry on aluminum foil.  Every time I laid a piece of jewelry on the foil it created a new scratch and wrinkle.  In a previous post I mentioned that a photograph shows every blemish including every scratch and wrinkle. 

I do not care for waste; replacing the aluminum foil for each photograph was not a viable long term solution.  My work-around was to purchase a silver colored tray.  This was not quite a success because it was too reflective. 

To resolve this problem I purchased a sheer piece of fabric to place on the silver tray and, thus, diffuse the reflection.  This worked well except I still had the wrinkle problem and to make matters worse the fabric I purchased is prone to scorching when ironed. 

This week I purchased a dull silver colored pizza pan at Wal-Mart for a mere $3.00.  I think this will work.  No wrinkles in the aluminum foil or fabric.  No ironing and no scorch marks.  Just the right amount of reflection, that is, the light bounces and there is a bit of reflective shine, but you cannot see the camera, my hand, or the ceiling.  I will let you know if scratches become an issue. 

I also purchased a tripod. 

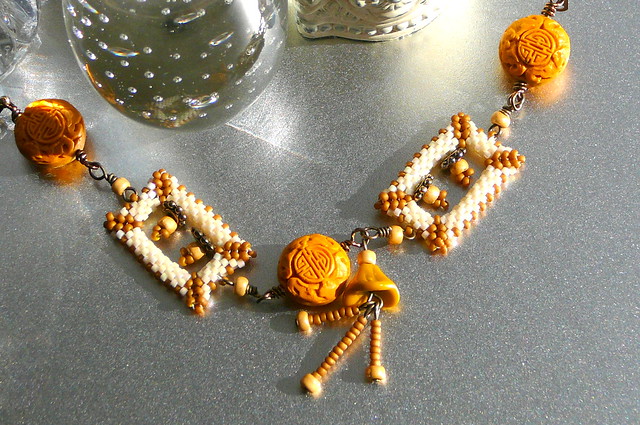
To test my new photography equipment I photographed a bracelet I made this week named Colonel Mustard.  The bracelet is made of mustard colored cinnabar, woven Delica beads embellished with Czech beads and brass spacers, joined by brass wrapped loops, embellished with a mustard colored glass bell, and an antiqued brass lobster claw. 
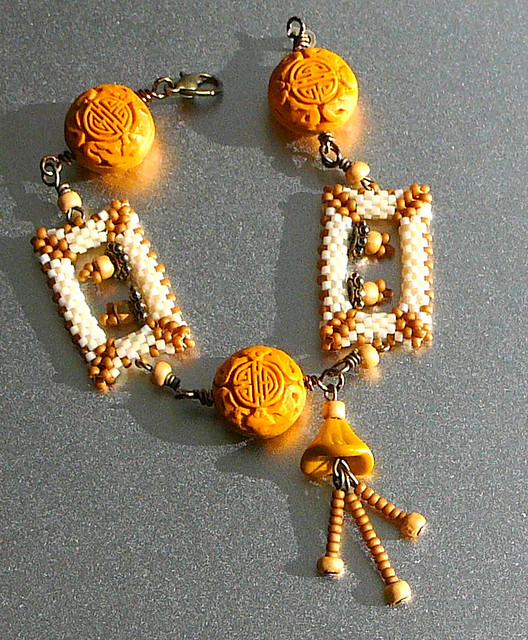
Colonel Mustard on the pizza pan
Colonel Mustard with the candle stick

If you would like a comparison of my trials visit my flickr stream to see the of Baroque and Brass.  When I was working on Baroque and Brass I photographed the center piece on aluminum foil, when it was completed I photographed it on the shiny tray with a fabric cover, and the final photograph is on the pizza pan.

Tuesday, February 22, 2011

My First Pictures

Last night Lori Anderson asked why do you follow a blog?  For the 100+ jewelry blogs I read, the first thing that came to mind was pictures.  Yet, you will notice that up until today I have posted no photos. 

I confessed my photos are more miss than hit and that I had ordered a light cube to address part of the problem. The light cube arrived yesterday.  Today I am posting my first photos. 

I have learned:
  • It takes a long time to take photos (especially when the battery in the camera dies.)
  • Nowhere is it posted what is the best size for photos to upload.
  • By reading The Pioneer Woman I learned that it is best to find a place to store your photos and then link to them in your blog. 
Now for the reveal:


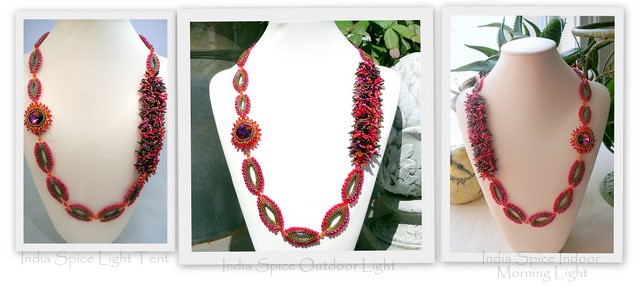
By way of introduction the photos are of India Spice.  I spent 60 hours creating this piece as part of an inspiration challenge.  The hot and spicy colors are outside of my usual comfort zone.   

The picture on the left was taken in the light cube.  I like it.  There are no distractions from the jewelry itself.  The lighting is even, no deep shadows, no bright spots. 

The picture in the center is probably my favorite; it was taken outside in bright north eastern light.  I like this photo is because the colors were well captured- you can see the hot reds, oranges, and pinks as well as the cooling sage green. 

The picture on the right is from this morning; it was taken indoors with indirect eastern light.  I like this picture too.  The colors are not quite as bright as the light cube photo.  I also like the props in this photo and the center photo.

The light cube is a wonderful tool.  I don’t have to wait for the right light.  I don’t have to rush through breakfast.  I will be able to obtain consistent photos that do not distract from the jewelry itself.  I will continue to play with natural light.  I will take photos inside and out, in direct and indirect light.  I do know that I do not like deep shadows, so I will likely shy away from direct bright light. 

What is your opinion on the three photos? 

Friday, February 18, 2011

Improving my Photographs


My photographs are much more miss than hit which has led me to the conclusion that I need to learn more about photography. 

On a bright sunny day I take a jewelry bust and a few props and head out the door.  On cold or overcast days, when I do not have time to wait for better conditions, I set up inside by draping a cloth behind my jewelry, focusing a few lights on it, and snapping away.  My pictures are washed out, have too many shadows, lack detail, and certainly do not do justice to my efforts. 

I am always hopeful that a bit of editing magic will make up for my lack of proper tools and my unpracticed photography skills.  You won’t be surprised to learn that hopes are often dashed. 

I need better photos in order to professionalize the sale of my jewelry.  The first step in better photos is to obtain a light box. 

I am creative, capable, and like to spend my money wisely.  My first choice was to build a light box.  The first instructions I found were how to make a light box out of a cardboard box.  The cost was perfect.  The product was workable.  I nixed this solution because of storage space.  I did not want to have to find a place to store a cardboard box big enough to work as a light box. 

I decided I needed something that I could take apart and put back together and that I could store in a small space.  I thought PVC piping likely as I had seen a similar light box in the past.  I discovered Bill Huber’s light box instructions. Again, the cost was great, likely to be under $10.00, and it was a workable product.  The construction did not seem to be above my skills or to call for tools that were not readily at hand.  The instructions did call for the pieces to be glued together, but I thought I could skip that step in order to make the light box easy to store.  Nonetheless, the deconstructed light box was still going to be awkward and a bit bulky.  I also had an inkling that I would not want to be taking my light box apart and putting it back together every time I wanted to take a picture. 

A commercial solution seemed at least worth researching.  That research was successful.  I purchased a pop-up cube that collapses into a flat disk for easy storage.  The price was still reasonable, $20.00 for a 20 inch by 20 inch cube.

The cube has not been delivered yet, so I cannot attest to the ease of collapsing it nor can I attest to the quality of the product. When it arrives I will let you know about ease of use and post some comparison pictures.