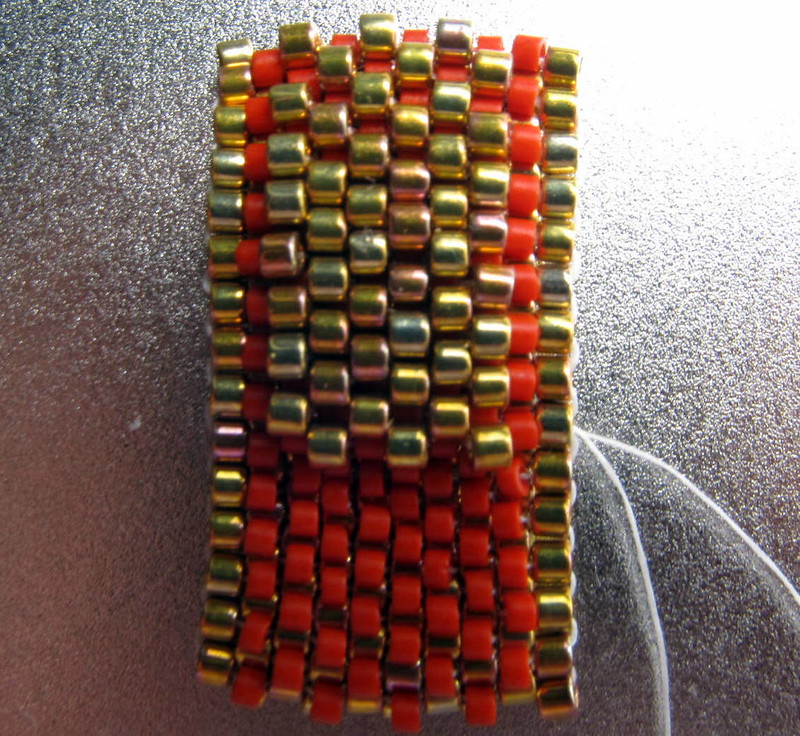
I designed some elongated beaded beads from a base of Cubic RAW for the cinnabar bracelet. The first one turned out so well I thought I would make a tutorial to share.
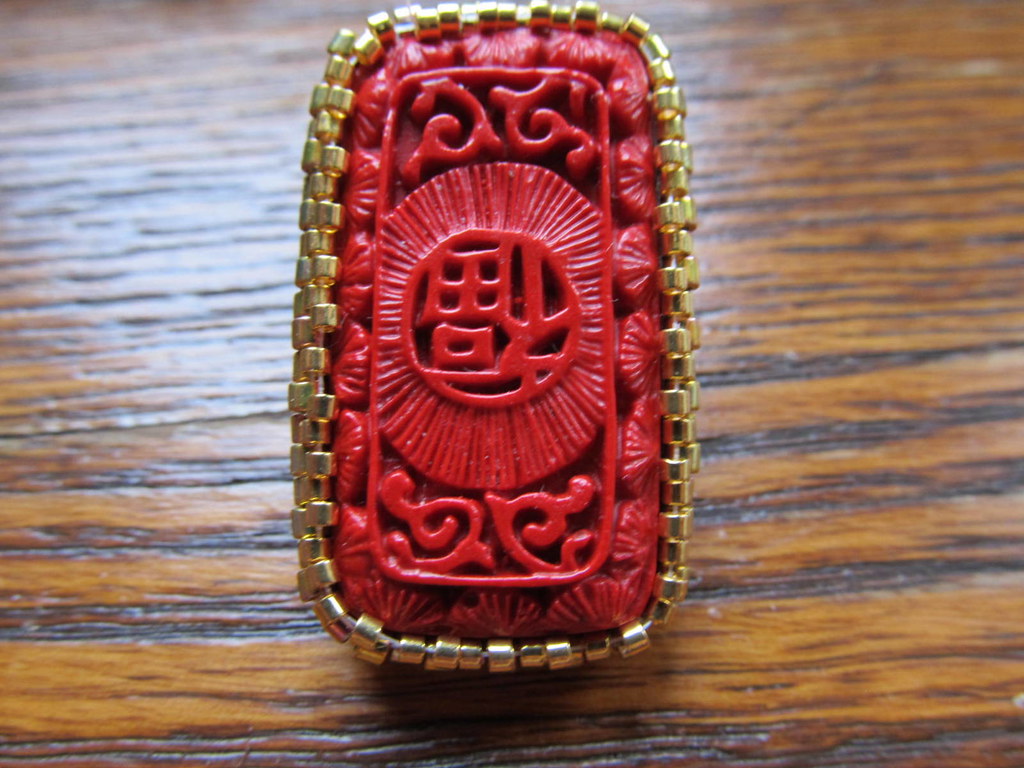
Here are some pictures with the bezeled cinnabar bead.
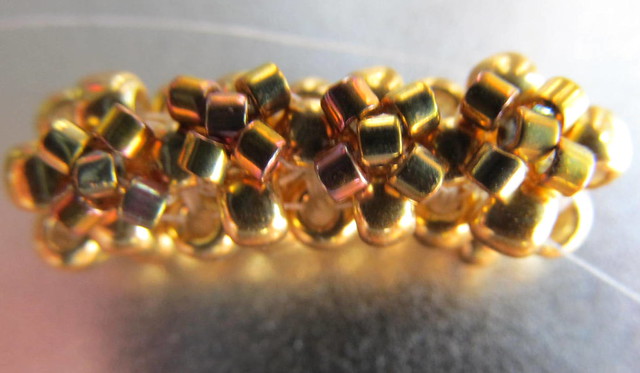
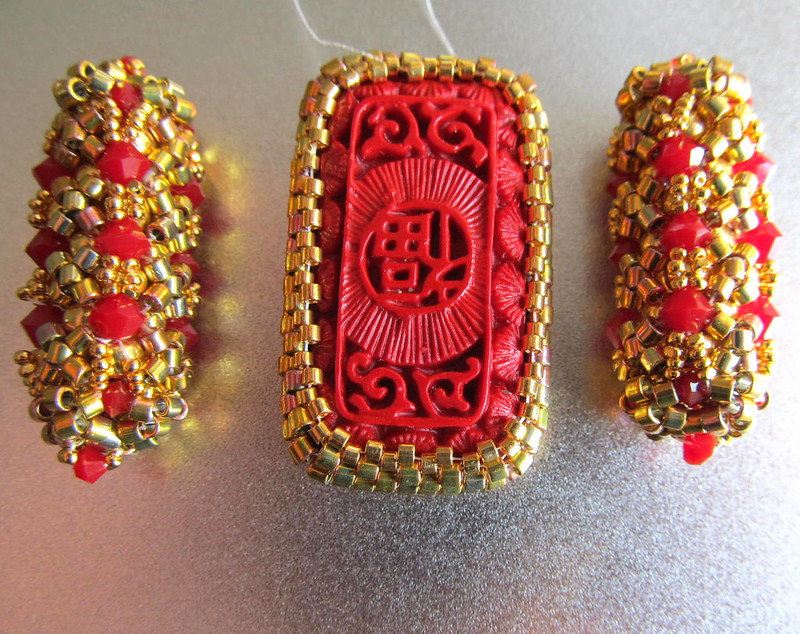 | |
| Cinnabar Bracelet Beads Side by Side |
 | ||
| Cinnabar Bracelet Beads All Stacked Up |
All the pictures for the tutorial can be found on my flickr photo stream which can be found here. I hope this link works, as I am logged in and I obtained the link by a simple cut and paste. Please let me know if you try it and it fails.
Tutorial for Elongated Embellished Beaded Bead
I used the following beads:
Toho size 6/0 gold colored beads for base
Delica 24Kt Gold Iris size 10/0 (DBM501)
15/0 24Kt Gold Plated Charlottes
12 Swarovski Dark Red Coral 4MM
10 Swarovski Dark Red Coral 3MM (this includes optional top embellishment)
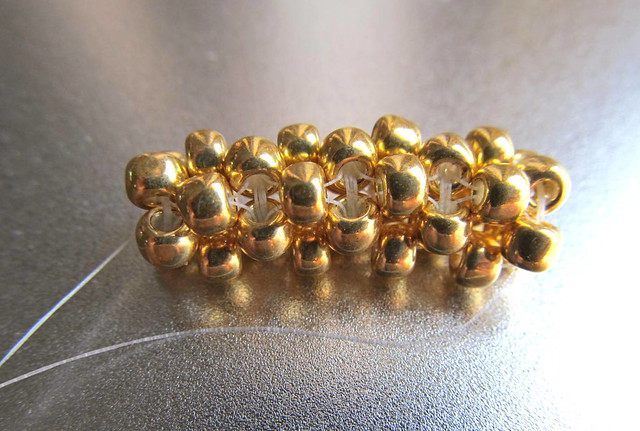 |
| Cubic RAW Base for Elongated Embellished Beaded Bead |
To begin, create a Cubic RAW base from the 6/0 beads that is 4 units long.
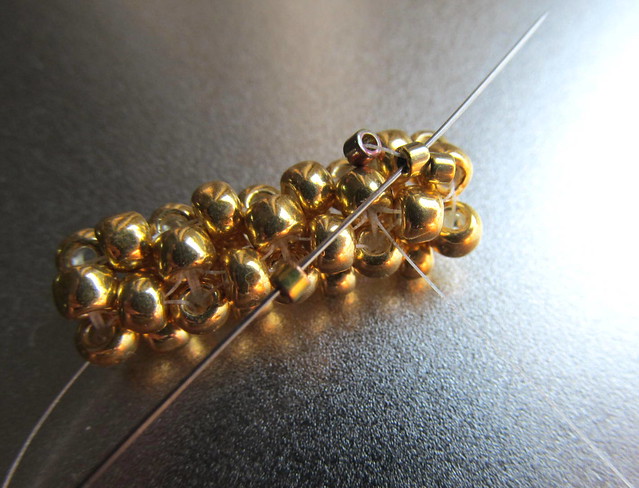
 |
| Tutorial Elongated Embellished Beaded Bead Step 2 Beginning X Embellishment |
The first embellishment is an X pattern made with the 10/0 Delica beads. Exit the top Cubic RAW unit and add three beads to your needle. Crossing to the bottom 6/0 bead of that unit enter through the opposite side. That is, if you exited the right hand side, enter on the left hand side. A misstep will be obvious.
 |
| Close Up of First Step of X Embellishment |
Here is a close up of the first step of the X embellishment.
I used 6/0's and 10/0's because that is what I had on hand. I am pretty sure this pattern could work with 8/0's and 11/0's which are more common.
 |
| Tutorial Elongated Embellished Beaded Bead Step 3 AKA X Embellishment step 2 |
Here is the second step of the X embellishment.
Add 1 10/0 and go back through the middle 10/0 you added on the first step.
 |
| Tutorial Elongated Embellished Beaded Bead Step 4 AKA X Embellishment step 3 |
This is the best picture I have of this step.
Now add 1 10/0 bead and go back through the opposite side of the 6/0 from where the X embellishment began. You can just see that added bead underneath my thread.
 |
| Tutorial Elongated Embellished Beaded Bead Step 5 Thread path to next X Embellishment |
The X pattern embellishment is going to be repeated 4 times per row, and then again on all 4 sides.
After exiting the top 6/0 bead you are going to go back through the side 6/0 bead on the underlying Cubic RAW unit and then through the bottom 6/0 bead of the underlying Cubic RAW unit. This will set your needle at the top of the next X embellishment.
Below are pictures of the second X embellishment and then the completed row.
 | |
| Tutorial Elongated Embellished Beaded Bead Step 6 Repeat step 1 of X Embellishment |
 |
| Tutorial Elongated Embellished Beaded Bead Step 7 Repeat step 2 of X Embellishment |
 |
| Tutorial Elongated Embellished Beaded Bead Step 8 Repeat step 3 of X Embellishment |
 |
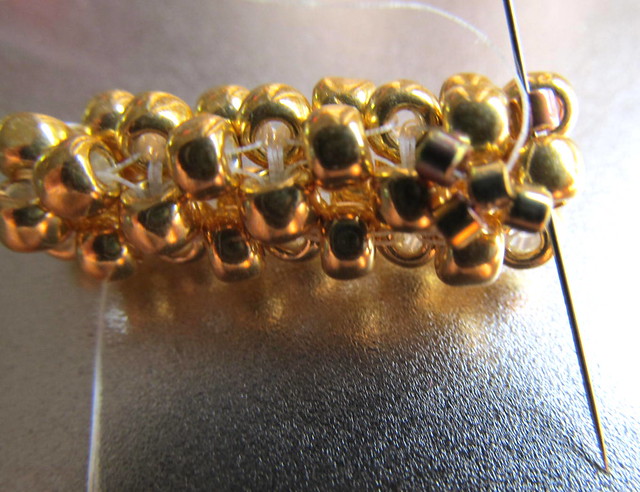
| Tutorial Elongated Embellished Beaded Bead Step 9 X Embellishment Row Completed |
 | |
| Tutorial Elongated Embellished Beaded Bead Step 10a Adding Bicone Row |
 |
| Tutorial Elongated Embellished Beaded Bead Step 10b Adding Bicone Row |
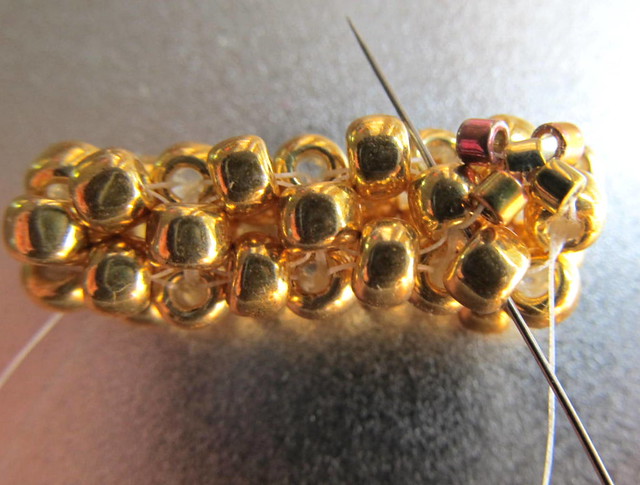
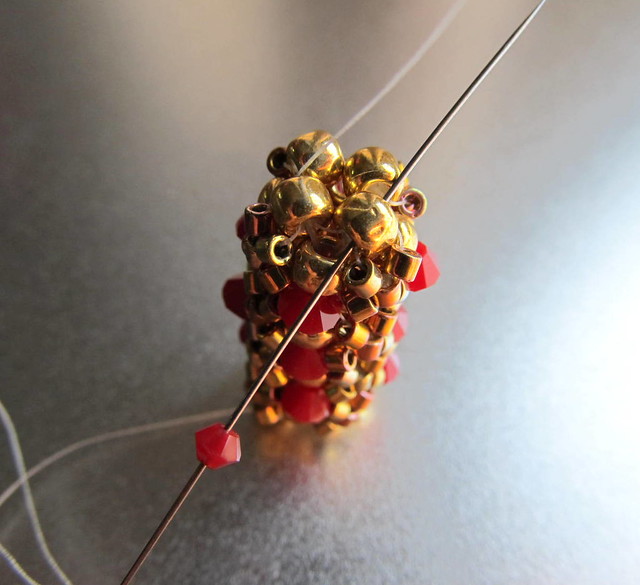
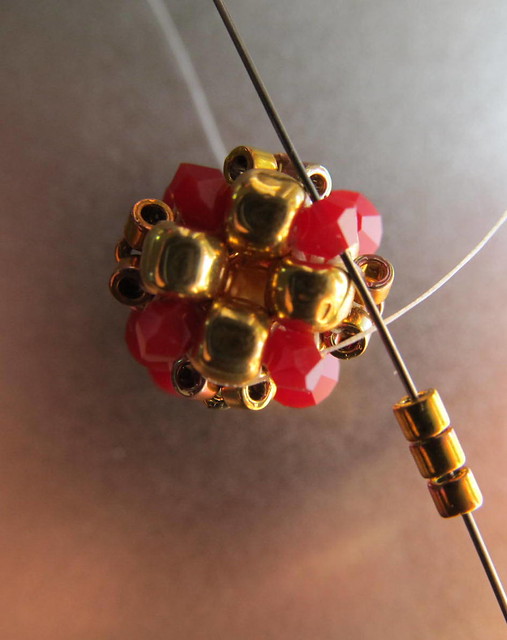
After adding the X embellishments on 4 sides add the 4mm bicones.
Follow a thread path through the 6/0 to exit at a side bead on the Cubic RAW base. Notice the X embellishments at the top and bottom of the beadwork to the right.
Add a 4mm bicone and go through the next 6/0 bead on the base. You will repeat this 3 times for each side.
 |
| Tutorial Elongated Embellished Beaded Bead Step 10c Adding Bicone Row |
 |
| Tutorial Elongated Embellished Beaded Bead Step 10d Adding Bicone Row Repeated 4 times |
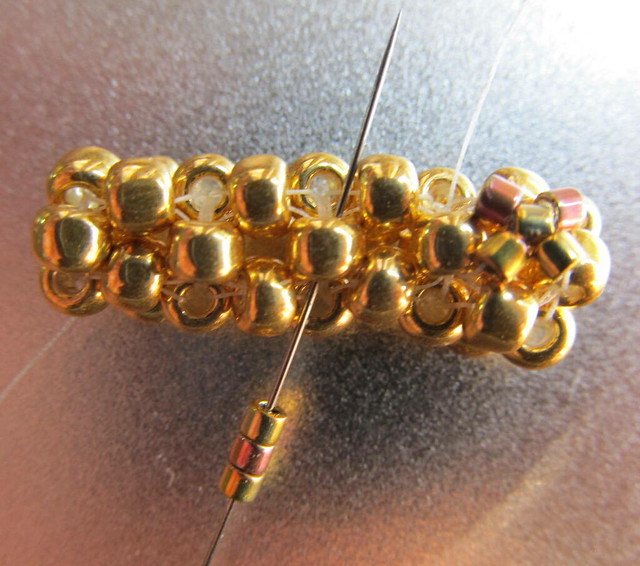
Repeat until you have added 3 4mm bicones on 4 sides of the Cubic RAW base.
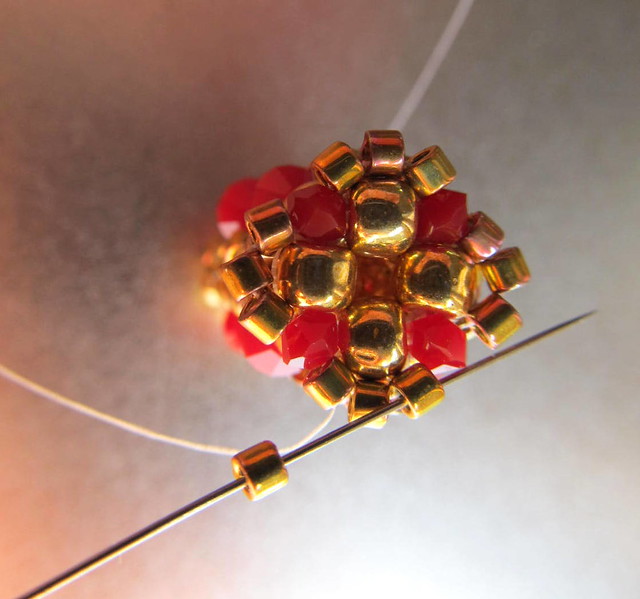
Add 3mm bicone beads between the top Cubic RAW unit.
 |
| Tutorial Elongated Embellished Beaded Bead Step 11 Repeated 4 times |
Repeat this step 4 times until there is a 3 mm bicone between each of the 6/0 base units. This is going to be the top or bottom of your bead, or maybe the left/right depending on how you orient the bead.
You are going to repeat this on the other end of the bead. If you have a long tail end you can add the 3mm beads now, or you can wait until you add the 1st row of 15/0's in the next step.
My pictures are not quite right after this step because there is an additional 10/0 Delica embellishment, which I found worked better if done at a later step.

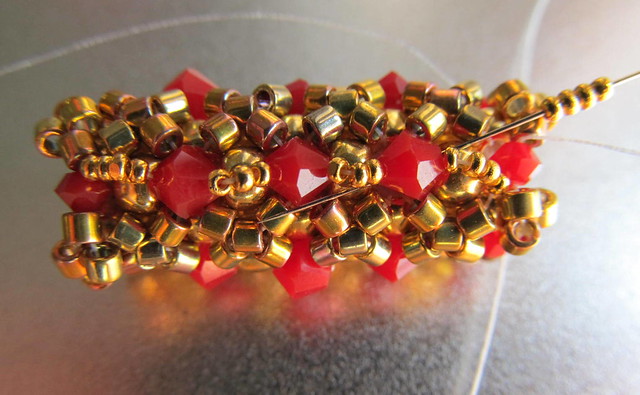
Exiting out of a 3mm bicone, add 4 15/0 Charlottes to your needle and go through the first 4mm bicone.
NOTE: the next row will contain only 3 15/0 Charlottes.
 |
| Tutorial Elongated Embellished Beaded Bead Step 15 Adding the Charlottes Row |
Add 3 15/0 Charlottes and go through the next 4mm bicone.
 |
| Tutorial Elongated Embellished Beaded Bead Step 15a Second Row |
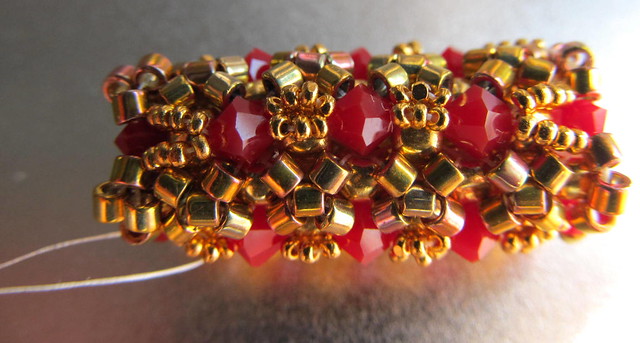
The pattern between the 4 mm bicones is 4 Charlottes, 3 Charlottes, 3 Charlottes, 4 Charlottes.
At the top/bottom, go through the 3 mm bicone and add 4 Charlottes and repeat.
 |
| Tutorial Elongated Embellished Beaded Bead Step 15b Repeated 4 times |
Add the double row of Charlottes on all 4 sides of the Cubic RAW base.
 |
| Tutorial Elongated Embellished Beaded Bead Step 12 Embellishing the Top |
Now to embellish the top. This is the step I have out of order on my photography. I had done this step earlier when photographing my tutorial; the weaving is easier if done at this stage.
Exit from the 3mm bicone and add 3 10/0 Delicas. Go over the 6/0 base bead and enter the next 3mm bicone.
 |
| Tutorial Elongated Embellished Beaded Bead Step 12 Repeated |
Repeat the 3 10/0 Delicas 4 times.
 |
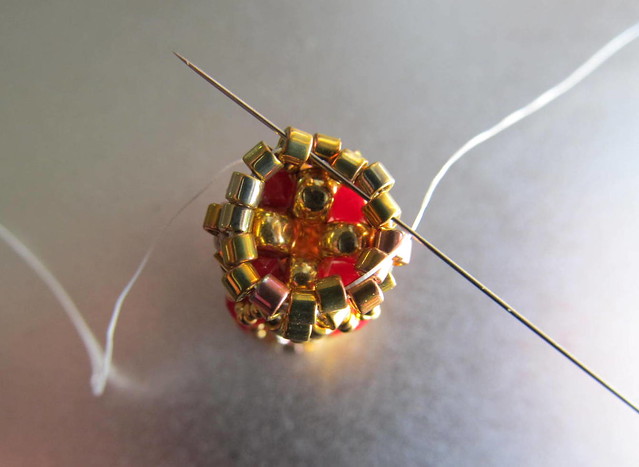
| Tutorial Elongated Embellished Beaded Bead Step 13 Beginning the Netting |
This step begins the netting for the top/bottom (or left/right) of the bead.
Exiting out of the 3mm bead, enter the 1st 10/0 Delica and add 1 10/0 Delica. Enter the 3rd 10/0 Delica.
Once you have exited the 3rd Delica, enter the next 3 mm bicone, then the first 10/0 Delica on the other side of the bicone and add the next 10/0 Delica, keep repeating.
This picture is only through the exit of the 3rd Delica.
 |
| Tutorial Elongated Embellished Beaded Bead Step 16 Netted Top |
Repeat the above step 4 times so each bicone has 4 10/0 Delicas between them forming a diamond pattern between each bicone.
Go back through the next bicone, and retrace your thread path to exit at the top 10/0 Delica. Add 3 10/0 Delica's and enter the next top 10/0 Delica. In other words, exit the 3mm bicone, add 3 10/0's count 1 10/0 Delica, 1 3mm bicone, 1 10/0 Delica and enter the next Delica.
Repeat 4 times.
 |
| Tutorial Elongated Embellished Beaded Bead Step 17 Netted Top Pulling it Together |
In this step you are adding no beads, just tightening the netting. Your needle is going to go through the middle beads of the last rows you finished above.
 |
| Tutorial Elongated Embellished Beaded Bead Step 17a Netted Top All Pulled Together |
Now pull your thread tight and you can call it done, or you can add one more embellishment depending on how you want to use your beaded bead.

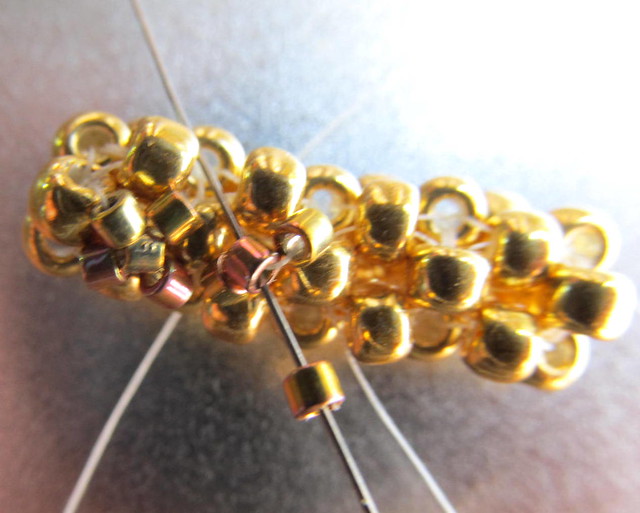
The final embellishment is a 3 mm bicone. This picture is not quite accurate of my finished piece.
This is a final X pattern. Exiting out of a 10/0 Delica, add 1 Charlotte, 1 3mm bicone, 1 Charlotte and enter the opposite 10/0 Delica from the side opposite that which you exited the 10/0 Delica on the other side. Gesh, that is confusing. Put simply, you are making another X.
Now add 1 Charlotte, back through the 3mm bicone, add 1 Charlotte, and back through the original 10/0 Delica.
I did not add the Charlotte the first time I did this and had too much exposed thread. Thus, the picture is not accurate and you should look at the finished piece at the top of this post.
Here are the elongated embellished beaded beads nearly done with different ending embellishments.

*sigh* this took me all day and I am anxious to hit "publish." No doubt I will read over this a week from now and realize how I could have polished it more. Nonetheless, I am going to publish this. If you try this beaded bead and run into issues, let me know and I will do my best to clarify.